Friday, September 15, 2017

Shed extension #5 (Container roof)

The container's new roof had to be strong enough to withstand a tropical cyclone or two and be built by one person. It would help transform the leaky container into a dry hut.

So decided on 4x2" wooden beam rafters to go across and 64 mm steel "top hat" purlins to go on length ways. (This is the method that most of the boat shed roof is built and proved category 3 cyclone proof, 180 km/hr winds). It would take a few weekends and "mid winter" up here is perfect for roofing jobs (16 - 27 C) and no rain.

Recycled materials were to be used as much as possible. So the best thing to look for first is the sheet iron. Found  twenty 12 foot long corrugated iron sheets in good condition at the local recycled timber yard "Full circle timbers" in Townsville, the price was about 1/3 of new sheets (it was $310 for a 3.6 x 13 m roof area). The ute slowly carried the full load a few km to city base, it weighed allot and was up on top of the carry racks so the center of gravity was high.  To go 50km on the open highway to the boat yard i took the sheets up in 2 loads, 10 sheets per trip. 80-90km/hr felt safe enough.


Once the roof sheet length was known, the number of purlins could be figured out. Drew up a roof frame plan. Downloaded a Stramit products table, what design spacing's etc in it for various products. 64mm high galvanized top hat with 1mm walls looked strong enough. 5  purlin's each 13 m long should do it (at around 90 cm centers), so 65 meters of purlin lengths required. This gave about 50 cm of over-hang at the ends.

The 30x30x3mm rafter support posts were welded in place. Twelve needed. One side was 6" and the other side 12" to give a moderate roof slope. "Metalfix" paint converted old rusty steel into near new and protected weld joins.

Welding posts on


Next trip was 4x2" hardwood beams salvaged from demolished "Queenslander" houses. These cost $4.40/meter. So $110 bought the 5 beams of 4 meters or so length each. They went up in one ute trip and joined the single 4x2 already there.

To get them up on the container's roof, the ute tray was rolled in to make a good scaffold platform about 1m high. which just left 2 meters to lift onto the containers roof.

The M10 threaded rods, boxes of gal nuts and washers cost about $40. The 4x2" beams were clamped on then holes drilled for the threaded rod bolts. About 45 cm (2 foot) of beam overhang was made on the low side, the high side was left open to be trimmed off later.

In the tropics ample roof overhangs are important. To keep downpour rains out and also to shade walls from searing sun heat. But with only 4x2" beams and the 12 foot sheets overhangs had to be limited to about 50-60cm on each side. Too much canter-levered overhang in a cyclone probably wouldn't be good!


Another weekend was time to get the top hat purlins. These are hard to find second hand, so new ones at around $7/m were $520 the biggest cost yet. At the steel retail yards they said they don't cut the 6.1m or 7.5m lengths in half to transport on standard ute carry racks anymore. Delivery cost by hire truck and driver would have been over $200.

So a day that weekend was spend fabricating a front carry rack for the Ute at the wylo yard using some scrap steel  laying around.

Started with old 40x40x3mm angles 8" long - these were drilled and bolted to the Toyota workmate (2004) ute's bull-bar mounts with 10 mm threaded rod.

Front rack attachment


Then recycled 3/4" galv pipes were cut and clamped together with wood frames to hold them while angling them and lining it all up on the ute. A partial A frame with a T top resulted, which gave good forward visibility (a vertical post would have sat in the drivers line of sight) and a semblance of sideways stability too. Once the dimensions were sorted it was tacked together, then fully welded. End ears also full welded on. The top cross bar is 0.9 m wide to take long roof iron sheeting if required.

Front rack - semi A frame with T top.


3 racks on ute - carrying 6.1m long top hats


Lashed a pipe fore and aft to brace the front rack in that axis, then went for a road test at 90km/hr. No harmonic troubles or wobbling at top speed. Chose the round pipe as its also an aero-dynamic section. (My first-ever front rack on the 1970 Ford XY falcon in the 1990's was a bit rougher, built with square box sections and angle steel, it worked well but was aerodynamic as a brick.)

So armed with 3 carry racks covering a 5m length of the ute, returned to "Orcon" steel retailers and the "Stramit" top hats were loaded on easily. They weighed 119 kg, so took it easy below 90 km/hr to deliver to the yard. Again the ute tray - scaffold system made it easier to hand lift the top hat purlins up on the container's top.

stabilizing pipe from from rack to cab rack
After use the front rack was quickly removed and hung up on the workshop wall on nails out of the way. (The back rack is also demount-able)

The third weekend's work involved getting the top hats installed over the rafter's. I made a 12 foot long measuring stick (sheet length) , drew up some profiles of the edge details in the office van (could add a barge board and rain gutter later), to figure out the distance between the two outer purlins.

"The boat yard office" 
All the top hats were fastened  to the wood beams with 25 mm wood tek screws. Just the occasional one to locate an hold at first, and later all the screws were sunk with the variable speed drill. To get through the 1 mm steel a small pilot hole was drilled with a second drill.

The lengths were joined with 20 mm steel self drilling tek screws with 30-40 cm overlap. 6.1 m lengths did not quite make the 13 m required so had to add a 166 cm final piece to each purlin length. This extra time and work could have been avoided if  7.5 m lengths were purchased instead.

Outer purlins in place

Next the 3 infill purlin's gaps were figured out, 85 cm centers gave even spacing. Used a red industrial crayon to mark things up, it was very easy to see on wood or steel. The infill pulin's were much easier, faster and safer to fit because of the solid container top to walk on.

13 m long Purlins all in place

Cyclone proofing was to add builder's strap over some of the purlins on the corners and edges of the roof frame. A cyclone could possibly rip a purlin (and whole sheet roof) off with out this extra fastening. It's held to the wood beam by 4 x 25mm wood tek screws. The strap also spreads the loading out over a wider area of purlin.


cyclone strap on top hat purlin


Roofing

Spent a day to get most of the sheet iron on, 12 foot sheets proved to be a manageable size. The first sheet was carefully squared up to the purlins. Used a 1.2 m straight edge and marked screw positions with the red crayon as each sheet was aligned.

Hex head tek screws (self drilling) were used, one every 2nd corrugation.


The completed roof made a world of difference inside the container. DRY and COOL. It was also up just in time for a very un-seasonal unusual heavy rain event in October over 300 mm in a week! (should've been the dry season but weather patterns seem to be getting more unreliable lately) The photo below also shows how green the lawn and trees suddenly became!


Monday, July 10, 2017

metalfix maintenance

Lately i've painted on more "metalfix" to preserve and maintain bare steel surfaces. Hes'e some of what what a 5 litre tub of metalfix can cover. it costs about A$200 for a pot up here.

"Metalfix" is a water based rust converter primer, it should slow the rate of any corrosion greatly, especially on lightly rusted surfaces. It quickly brightens up the workspace and makes is much more pleasant to work in. It's intended to be a construction coat only, at the end of the day only a good sand blast with good coatings can be used to go into extended salt water use.

Parts of the wylo hull

A keel tank before treatment, looking down onto 12mm keel base plate

The bilges and keel tanks below floor sole level


Treated the decks. Rust pitting chipped out first. Decks are the most venerable part of  a hull under construction  to rust pitting. If bare steel building suggest metalfixing early on. Better yet get pre-sand blasted and primed steel sheets from the supplier - it may cost more initially but is well worth it in the long run.


The aft peak
The bow and bow rail

some metalfix to the quarter
The ends of the hull get a bit of rain on them that blows in from time to time, any moisture on steel increases corrosion rate so brushed some metalfix on these areas to preserve them.


The 40 foot containers roof

Not knowing anything about sea containers..in 2010 i bought an old cheaper one for 4k (as opposed to a good sandblasted and painted one for 7-8k)..maybe a mistake in the long run.

About 6-7 years later, the containers roof was rusting through and leaking. So have used metalfix and fibreglass to cover the holes. Each rusted area was heavily chipped with a weld hammer and wire brushed, this makes a better key for the paint and glass.

Metal fix and fibreglass to seal holes in container roof

Rusted area in foreground, over-roof going up in background
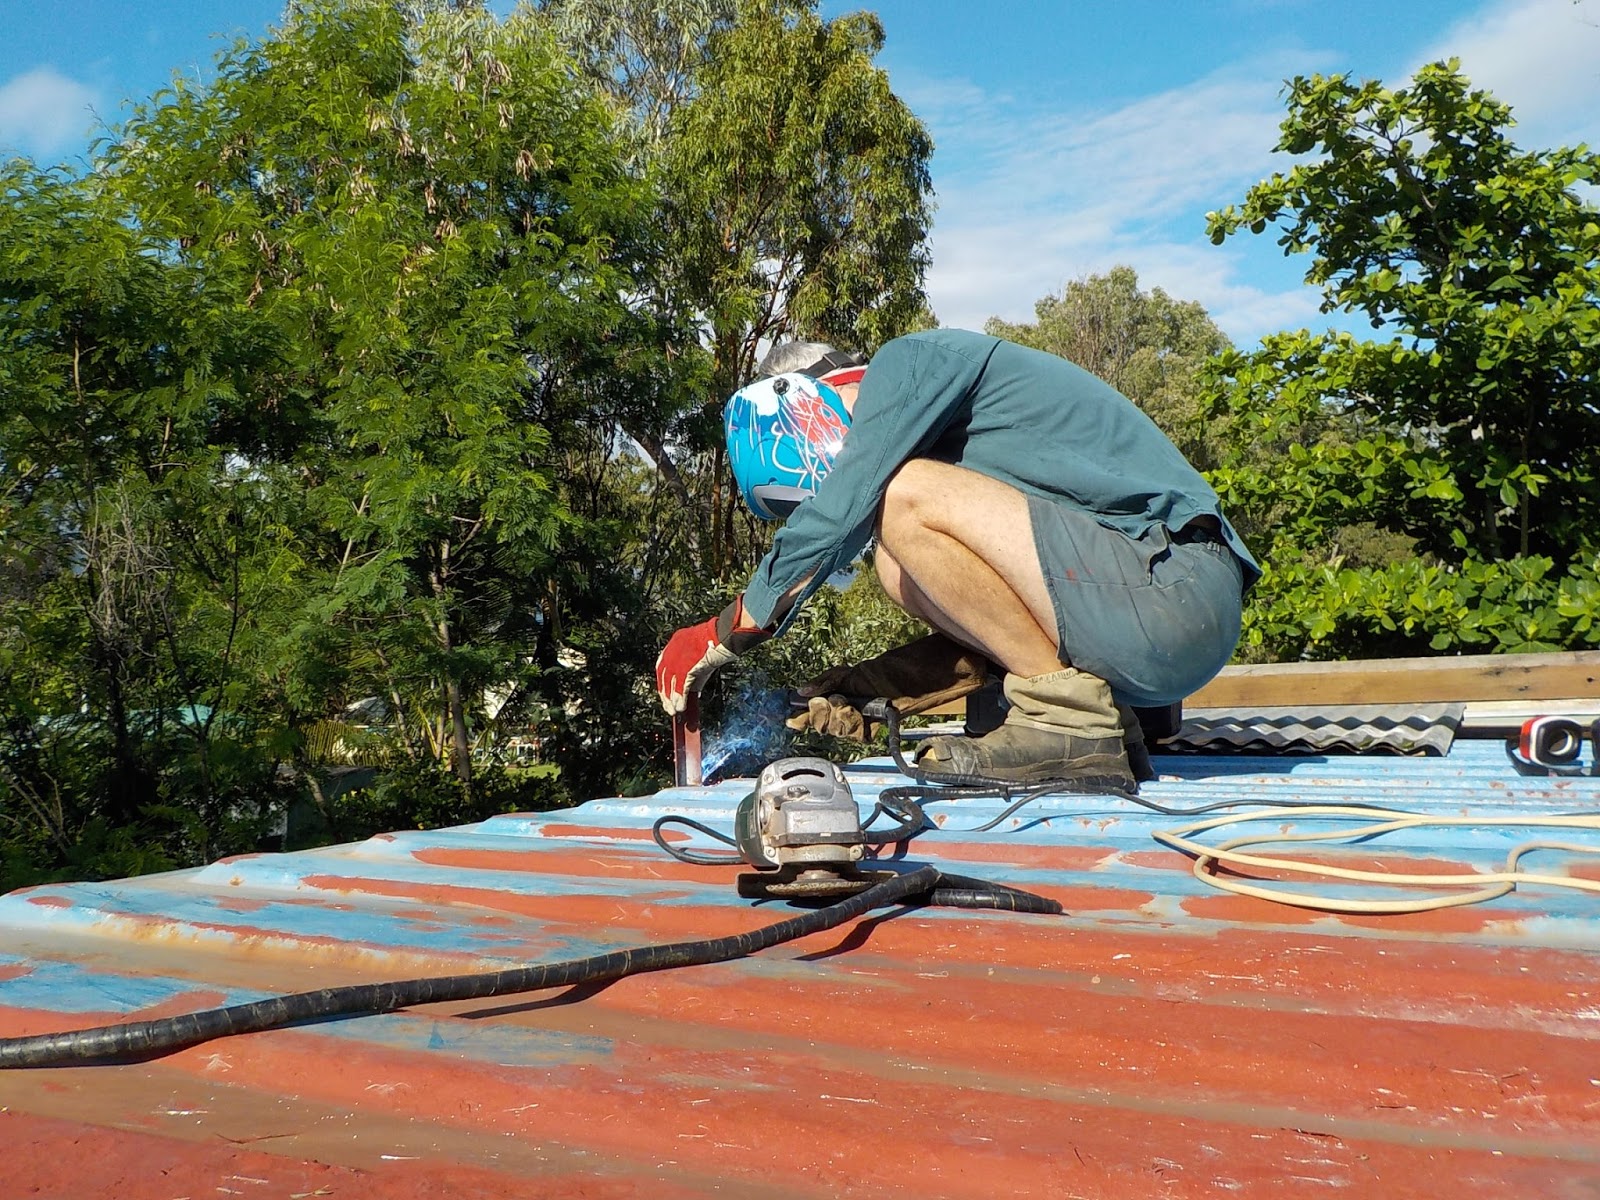
Started building an "over-roof" too. This involves a frame of short angle steel posts welded to the container and wood 3x2" beams bolted to the posts. recycled corrugated iron covers it. It keeps the actual container roof dry too which should further prevent the  rust reforming.

Making support posts up from scrap 30x30x3 angle. Metalfixed them to look like new.
 Drill press and a bench made from an old house door.


Welding on a support post for over roof. New weld helmet with auto-darken eye shield well worth it.

Most of the rust happens in water pools that form on the containers roof. These are often depressions caused from other containers hitting it during its service life.

So to avoid this - buy a good container that's not dented, has been sand blasted and painted. Then place the container so there's a slight cross slope to drain water off.

In retrospect if you buy an old dented container with minor rust like i did, then its worthwhile building the over roof as soon as its on site.

I hope my living and learning (the hard way)  helps other boat builders when setting up their yard.

A few other things

"Ned Kelly" the wood heater stove. Metalfix can withstand 1000 C.
The old trampoline frame restored

Wheel barrow tray - fibreglass and metalfix, holes sealed.
Also metalfixed parts underneath my trayback ute. Like the muffler, tail pipe, anything with corrosion.

A good feature is metalfix won't react badly with galvanized surfaces (unlike conventional rust converter such as phosphoric acid which damages the galvanizing)

Thursday, March 17, 2016

Engine room 2

Have been out sailing from time to time in the Investigator and Fatty Knees. Went on 3-day cruise in Teria (link to the beginning click "newer posts" to see whole trip) and learnt a bit more about logistics and cruising.

It's helped to decide which way to go with the wylos engine. I have been interested in the electric auxillary concept but lately have swung back in favour of a diesel.

Teria's cruises made me realize that a decent range is needed from an auxiliary engine. On the Palm Islands trip I used about half my fuel but motored or motor sailed for many hours and at least 20 nautical miles. Sailing was done as much as possible but the lee side of the Islands had little wind. On the windward side the motor helped greatly and allowed higher pointing to windward and ability to clear the danger of a rocky lee shore quickly then get to safety and home on time. The downside was the outboard was quite noisy at times.

Townsville's Ross River is now a motor boat harbour thanks to a recent low level  bridge. .So it may be feasible to launch this wylo as a motor boat, where it can be moored cheaply upstream of the low bridge. then  finish the rig etc from a city base.

In this case the diesel engine would be the best solution.

Also set-up cost wise it would work out far cheaper initially than an electric drive probably about half to or quarter the price of all electric or a hybrid . no lithium battery pack (10k), few solar panels and no wind or auxillary genset costs (10-15k) required up front.

Aft Peak - cooling pipes, tank and stern tube (for propeller shaft)
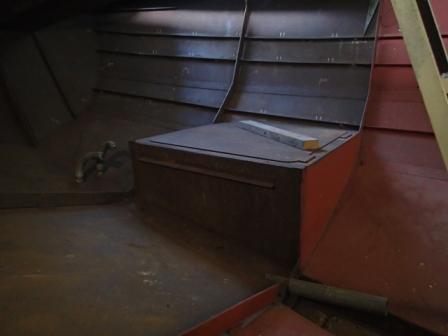
 Already fitted - the keel cooling inlet and outlet pipes. The stern tube and a basic tank (without fittings). This is the space for the exhaust and cooling systems (plus stowage and quarter berth)


Aft peak under the cockpit and aft hatchway.


Wylo hull interior (taken from forepeak)

The main cabin looking aft. There's allot of space  Currently a  temporary work bench and some construction planks are in there.

I painted the interior with Metalfix  years ago and its held up ok. The cabin roof was also coated with metal fix then white king coat and that hasn't changed in the same time. It seems to hold corrosion well inside.

Monday, August 4, 2014

Wylo2 yacht register

The (now defunct) yahoo wylo2 group, posted an updated (2014) worldwide register of wylo 2 ' s. The numbers below are  changing as new info wylo's comes in.

About 45 wylo2's were reported launched and sailing.  Nine gaff rigged wylos were listed as under construction ashore

 Most Wylo2's are gaff rig, several are 2 mast junk rigged and one is Bermudan cutter rigged. Most are 32 footers and about a dozen are are 35 footers. 20 boats have full keels (FK 4'3" draft), 20 boats have centerboards (CB 3'3" draft), 3 boats have wing full keels (WK 3'9" draft).

In the 35 foot full keel gaff class, similar to my hull, there are only 9 sailing in the world. Most 35's are in the UK.

In Australia/NZ there are approx 13 wylo's. There are 8 wylos built in Australia. 6 are 32' CB gaffers, one is a 35 FK bermudan  In NZ there are four 32 ft CB gaffers and one 35 foot wing keeled gaffer operating. 35 footers are rare south of the equator. A 35 ft FK gaffer (Ironbark) built in Queensland, sometimes stays in NZ and spends most of her time  in many destinations around the world.

As for auxillary engines most are diesel of 14-30 HP. A few may be petrol. several UK wylos have hybrid engines and one from Canada has a Thoosa 9000 electric motor fitted.


Wednesday, July 9, 2014

Cruising yacht books 2

May as well start with the sailing-type books in the wyloyard's bookshelf as some boat-builders are probably also sailing in an affordable way already.

"Sensible cruising - The Thoreau approach" by Don Casey and Lew Hackler. A must read before embarking on any sailing venture.. It goes into the economics of cruising yacht ownership early on. In fact i wish i had read this book before starting to attempt to build a large yacht, life would have turned out very differently now, allot more sailing would have been done and some of the dreamed of places may have been visited.


At any one time we only have x-amount of finances and earning capacity, so at that time which could be now, the finances are weighed up and a much smaller boat than what was dreamed of can be bought so that the dream can become reality.  The cruising goals can be downsized at first, how about a coastal cruise to some offshore Islands near home instead of the Tahitian Islands? That mind-shift shaves decades off the dream to reality time for most of us. (Later you can get the bluewater cruiser). Allot of other practical things about yacht set-up and management are also covered. Thoreau discovered the magic of the wilds in a small canoe, this mindset works wonders. I applied the philosophy and bought a Fatty knees 8 sailing dinghy cheaply and found many "walden ponds" are right there under our noses. An even cheaper first craft could be an old kayak. Casey and Hackler talk about "micro-cruisers", keeled craft in the 24 -28 foot range but this can be downsized to trailer-sailers/yachts in the 16-22 foot length range, light enough to be tow-able behind a medium-large car. There is also another category of "beach cruiser" - a light displacement open dinghy for sail camping in the 13-16 foot length range tow-able behind a small car

A cruising guide book is invaluable where-ever you are based. For this part of the world a popular guide is "Cruising the coral coast" by Alan Lucas. This is an authoritative cruising guide to the Queensland coast which first came out in 1968 has been reprinted many time since  and can be found on the book shelves of many boating supply stores in Queensland. I used the book on-board Pablo in 1989. More info here. Lucas also authors  "Cruising the NSW Coast" which was on Pablos bookshelf for the voyage along that open stretch of water in the Tasman Sea. The guides are available from boatbooks or most boat chandlers in Australia. Updates for both guides on Alan Lucas's book website - (Look for the wylo2 which features in  logo top left ;-)