(updated 28/9/21)
Wylo2's can stow a wide range of dinghy types. Some have inflatables and there is plenty of deck space for a hard dinghy as well.
From what i've seen and read many small, coastal or part-time cruising yacht's tend to go for inflatable dinghy's. Hard dinghy's seem to be seen among larger permanent liveaboards or ocean voyagers.
I decided to start with a hard dinghy, rather than an inflatable. Hard dinghy's should last longer, row and sail well. A cost-effective small 2hp outboard can be used for situations like calms, long distance, going upwind or time constraints. Hard dinghy's won't deflate, perish or need replacement after a few years in the sun. They are often easier/cheaper to find for sale by word of mouth when living aboard or asking around at a boating club.
My dinghy had to fit on the wylo's davits/decks, row/sail well and take a few knocks around pontoons or on beaches, oyster and barnacle encrusted rocks, wharf piles etc. I wanted good carrying capacity and low cost maintenance ie. a practical workboat. It would be used in anchorages and harbours which are usually fairly sheltered but have enough stability and freeboard to survive a rough patch if needed. Have 3 types of propulsion - sail, oars and motor.
Nick Skeate's recommended buying a cruising sailing dinghy while boat-building (He had a 12' Heron while building wylo2) A good size range for an affordable manageable sailing dinghy is 10-14ft. I look for solid ones that can be cruised with simple gear and sails, rather than tippy ex racers (Heron, Mirror, Dehavilland Vagabond 12, Capercat14)
Nick Skeate's recommended buying a cruising sailing dinghy while boat-building (He had a 12' Heron while building wylo2) A good size range for an affordable manageable sailing dinghy is 10-14ft. I look for solid ones that can be cruised with simple gear and sails, rather than tippy ex racers (Heron, Mirror, Dehavilland Vagabond 12, Capercat14)
There is a wide range of small yacht tenders out there and the search for a good design/ designer was not easy. It took some time, research and looking about, definitely not something to rush into. Many of the nice designs are not readily available second hand and need to be home built, so just kept looking at 2nd hand market.
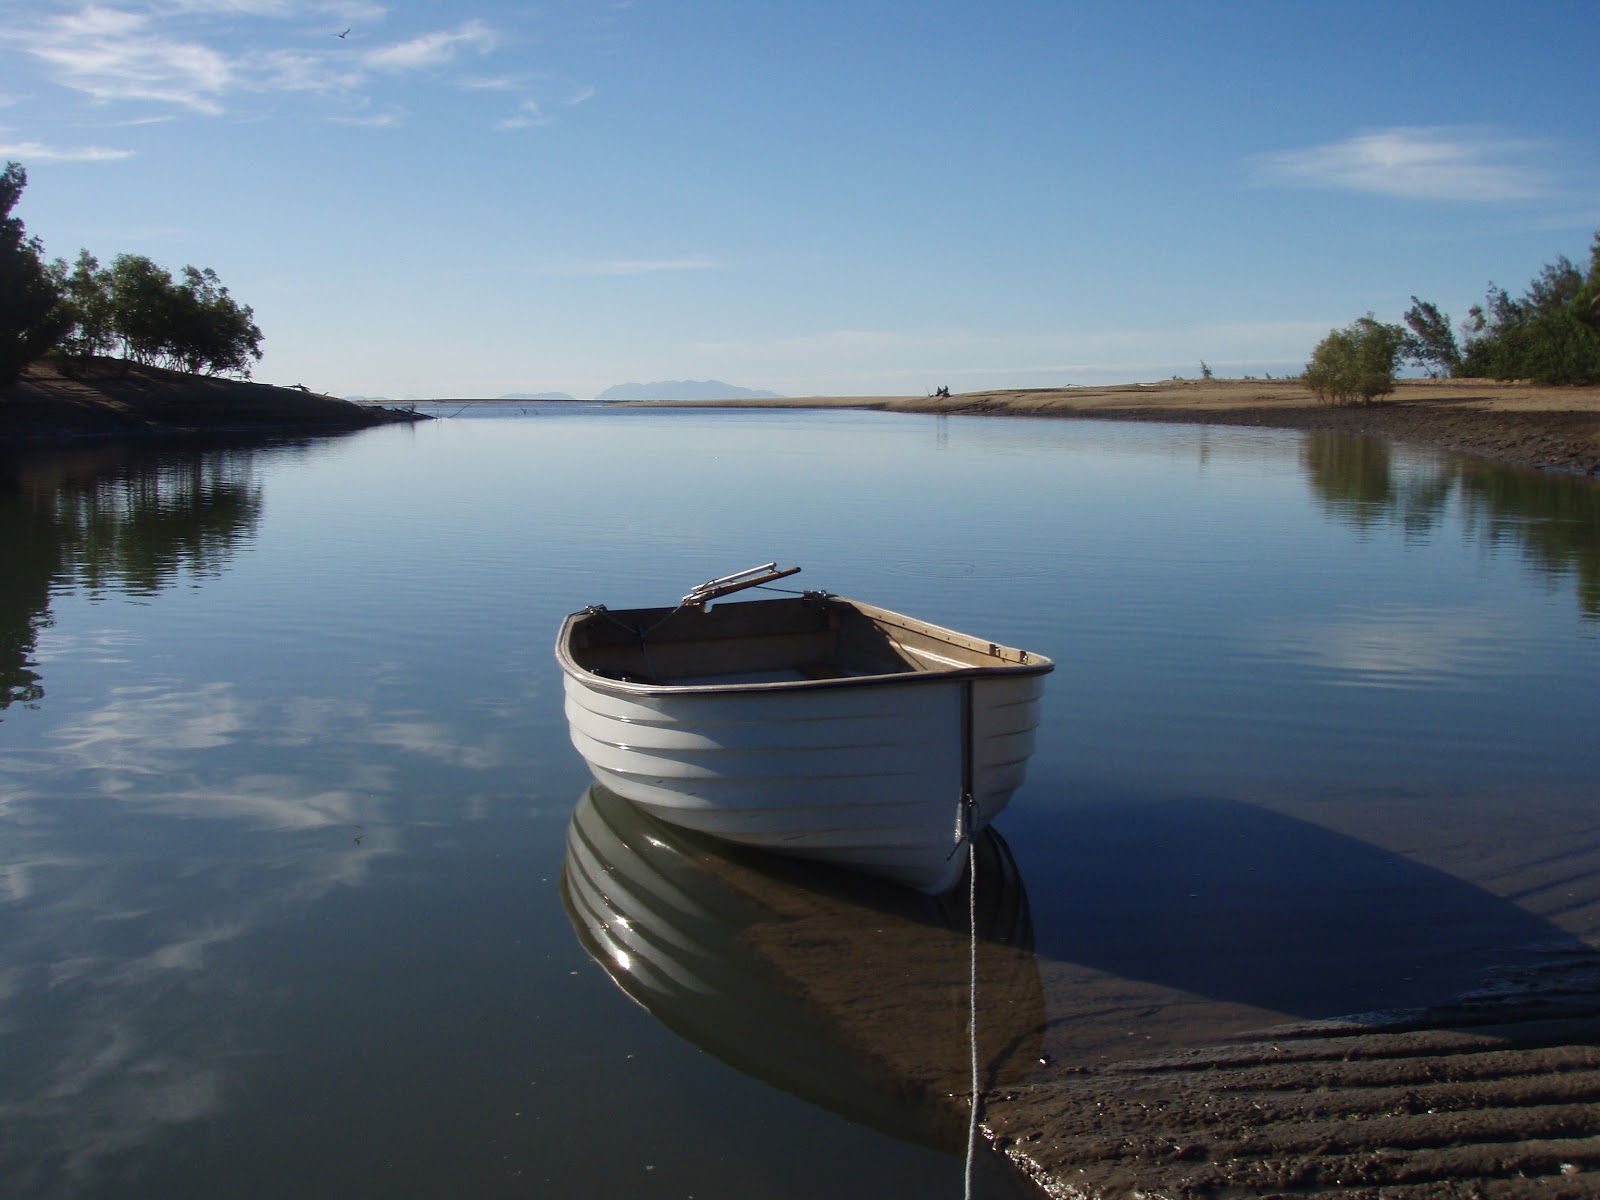
Eventually spotted a second-hand Fatty Knees 8 online. It was a sturdy looking cat rigged clinker with free standing mast.

It was designed by L Hess in the 1980's and many were built in the USA. Cruising authors, Lin and Larry Pardey owned Fatty Knees tenders for decades and took them around the world on the decks of their 2 Gaff rigged pilot cutters, so it seemed like a promising design for a tender. Browsing google books site found information by the Pardey's in their book Capable Cruiser.
The hull shape and design was also similar to the first dinghy i had ever rowed, a far-heavier wooden lapstrake 8 footer.. My brother and i had also co-owned a 10' kauri frostbite clinker dinghy in NZ which had a stayed Bermudan cat rig and rowed well.
Safety, displacement hull, performance, balance and graceful lines are major design criteria. They have lapstrake (clinker) fibreglass hulls with traditional teak trim. The copper roves holding the gunwale together give a sense of nostalgia and feeling of being in a traditional wooden boat. However the fiberglass hull and buoyancy tanks gives it the advantages of lighter weight, rot proofing, low maintenance and water tightness. The moulded lapstrake shape makes the hull very strong too, it's like having many in-built longitudinal stringers. High freeboard allows it carry a heavy load even in choppy conditions.
There are 3 versions of the Fatty Knees dinghy - 7', 8' and 9' long.
The 7 ft version was designed for the Pardey's first yacht 'Seraffyn' which was launched in 1968.
The Fatty Knees 8 was the final version, created in the early 1980's. It has 4'3" beam, the bare hull weighs 50kg and the Bermudan sail area is 50 sq ft. A short article by Lin Pardey "My favorite dinghy" talks about its development history. The Pardey's commissioned Lyle Hess to design it for their 29'9" pilot cutter "Taleisin" which was launched in 1985. Larry Pardey built the original plug (from wood?) for fiberglass production of the hulls.
They were originally built by Hess' yard in Ontario, California. Then they were built by Eddy and Duff in their traditional boat yard in MA until it's closure in 2010. Fortunately, modern versions are still in production today at "Fatty Knees Boat Co LLC" Sagmore Beach, Massachusetts. One Tough Tender has more detail.
In my case it was lucky that some years ago a trans-pacific yachty visiting Queensland had decided to change to a lighter weight inflatable. I heard he was a solo sailor and the Fatty knees was getting too heavy for him to lift aboard and handle alone as he got older.
After purchasing her, she was named "Jai Dee", which means good heart in Thai.
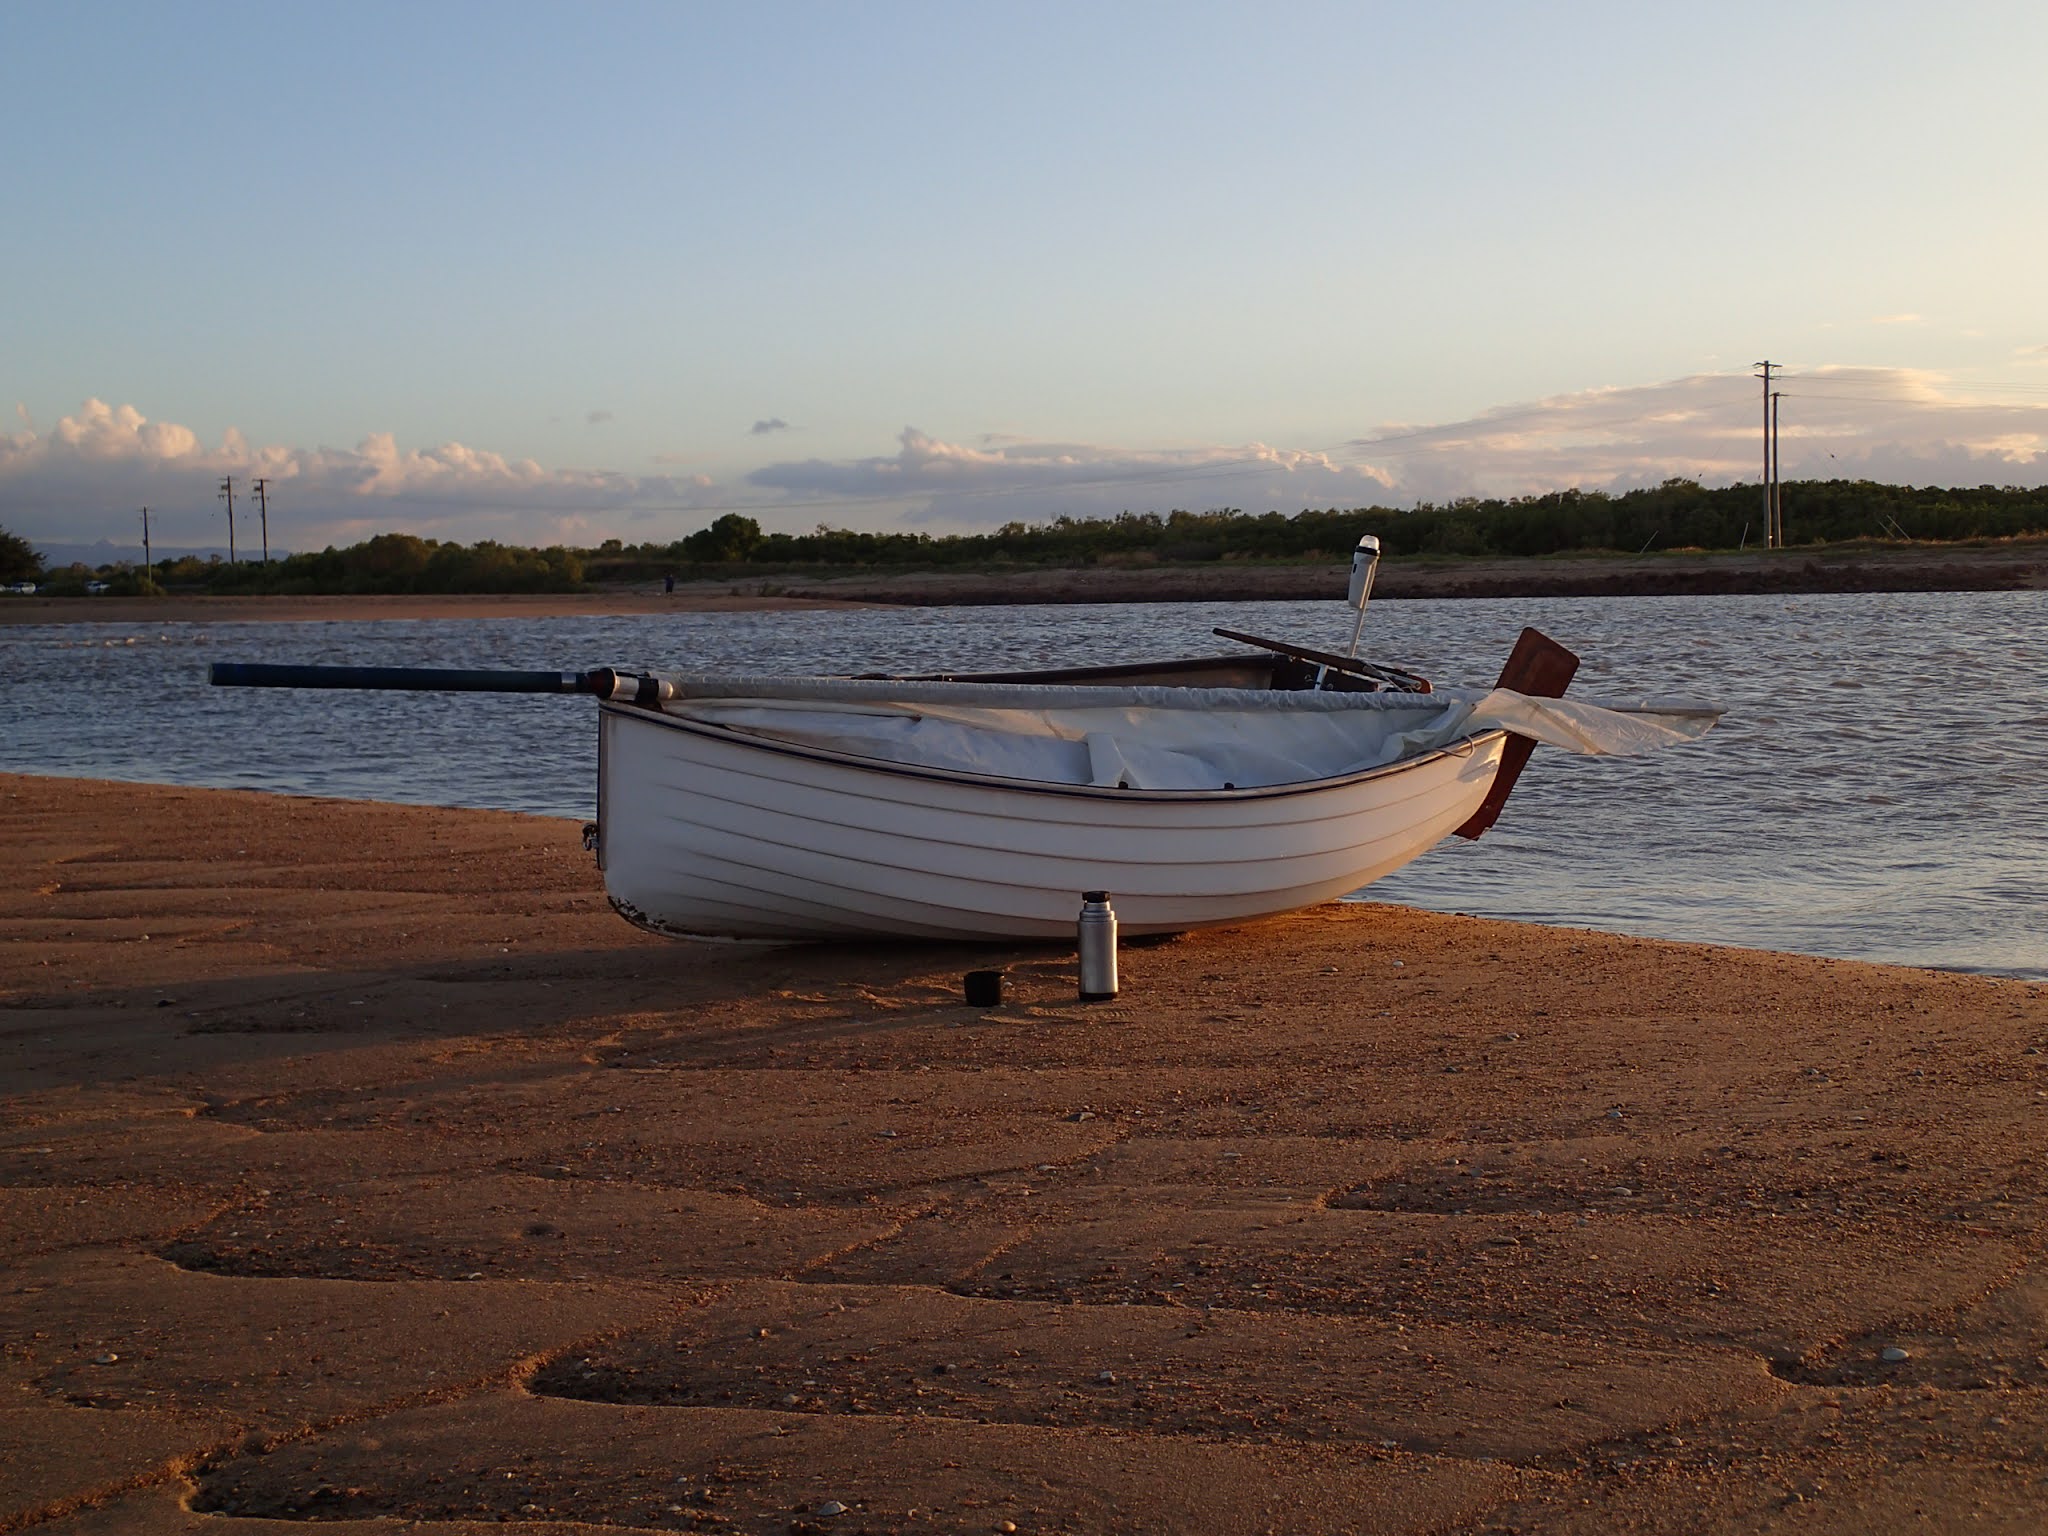
She has a 2 part fibreglass mast with a middle join. Spars stow within the hull length and still leave enough space for rowing. The mast goes into a luff sleeve on the sail, the wooden boom swings off a gooseneck and the clew outhaul cleats off along the boom.
The rowing seat also houses the dagger-board case and forms part of the forward buoyancy chamber. An small insert board plugs the dagger-board case when rowing, towing or motoring to stop water entering. The forward chamber has an 8" inspection port for dry storage. There's a second sealed buoyancy chamber-thwart inside the transom.
A rope traveller carries the mainsheet above the tiller and the working end goes to a cleat on the aft end of the centre seat.
I repaired the dinghy's converted box-trailer enough to get it road registered. Then it was down to Ross River ramp for the relaunching. This was a great day as my last operational sailboat was a Hartley TS16 which was reluctantly sold off in the late 90's. On the trailer or out of the water Fatty knees are quite chubby but once in the water and loaded the proportions look just right. There's plenty of crew room inside and stacks of freeboard.
 |
| Fatty Knees 8 "Jai Dee" |
A rope traveller carries the mainsheet above the tiller and the working end goes to a cleat on the aft end of the centre seat.
Later boats seem to have aluminium masts, a sail track and halyard so it can be raised lowered easily while aboard. Check out Fatty Knees on Glissando's site.
The gunwales project out from the hull and have rubber tube for protection alongside docks or bigger boats.
Rudder
She came with a kick up rudder. It was a DIY homemade one with a weak ply blade and not the original, and eventually broke. I replaced this with the original oregon fixed rudder blade. This is far stronger but needs to be unshipped when in the shallows near beaches.
Rowing
She rows well, seems to glide along between oar strokes and has a skeg aft so she tracks well too. I take the 2-part lightweight oars for calms when out sailing. They have a swivel-type rowlock attached to the oar shaft and stow in a bag up forward. There are 2 oarlock positions and a centreline seat, so the rower can move to balance fore and aft trim when 1, 2 or 3 adults are aboard.
She also has a pair of heavier standard 8ft oars with ring crutches for rowing only.
There is a transom notch for single oar sculling. I put a cleat with lanyard below the notch, so the scull can be held down. It's mainly used for steering in shallow waters when the fixed rudder is unshipped.
Sailing
Sailing
The simple Cat rig was very fast to rig - derig in about 5 minutes. The mast is free-standing and drops in about 8" behind the stem post, there's no boom vang either so this allows a lot of crew space. The hull is quite beamy at 4'4" plus a low deadrise angle and bilge seating makes it pretty stable. She sailed well in light to 10-15 knot breeze. The absence of a pram bow allows the dinghy to slice through the waves.

I was surprised how well she sailed to windward. On a close reach in 5-10 knot winds we were just a tad slower than an inflatable tender with a 2 horse outboard. Rig-hull balance is good, slight weather helm and light on the tiller on all points of sail. She's very responsive to the helm and tacks or gybes easily.
The dagger boards ok in a muddy estuary, kept it half-up until i was used to the bottom depths, it was ok to windward like that. Not as good as a kick up centerboard but it gains valuable sailing space inside. The interior is designed for the crew to sit in the bilge, low down like a Kayak which gives more intrinsic stability in gusts and lulls, not much need to move too much to control the heel angle or stay upright. The generous aft sections also allow the helmsman to stay well aft, even lounge back with the aft thwart as a backrest. The rudder is a kick up one, good for shallow water sailing. A small tang prevents the rudder slipping up and off the gudeons. The kick up rudder replaced the original fixed rudder-tiller assembly (kept as a spare).
Outboard on Fatty Knees.
After over 40 sail and oar afternoons spanning many years, finally repaired JaiDee's 2hp outboard. It sits well on the port quarter with a couple of removable plywood pads under the clamps to protect the transom. Half throttle had her cruising nicely along the river.
Recently (September 2021) tried outboard/sail and oars combination together on a 3 hour excursion off Townsville.. Rigged a longer/adjustable main-sail traveller rope up for the mainsheet to fit around the outboard when changing tack. She can now be powered by any combination of the sail. oars or motor in a single outing. This turns JaiDee into a better micro-cruising dinghy, increasing safe operational range. The outboard pushes her at hull speed with half throttle on calm water.
Towing
Fatty Knees are designed to tow well behind a yacht. There's a strong eye bolt through the stem post at deck-seat level. The previous owner sometimes towed her over to Magnetic Island from Townsville, a 5-mile stretch of water which is often choppy.
Anchoring
I replaced some oversized anchoring gear with a small folding anchor, attached to 3m of 4.5mm chain and 18m of 10mm silver rope warp. It all fits inside the inspection hatch. Added an anchor cleat forward.


Anchoring
I replaced some oversized anchoring gear with a small folding anchor, attached to 3m of 4.5mm chain and 18m of 10mm silver rope warp. It all fits inside the inspection hatch. Added an anchor cleat forward.


On local fishing advice, I attached the shackle to the crown of the anchor and used a moderate strength cable tie to attach chain to the shank end. The idea is if it gets fouled on an obstruction (coral head, mooring cable etc) then the cable tie breaks and the anchor frees itself. This is Ok provided you are aboard all the time. However, to leave the dinghy unattended on anchor, a safer option is the usual shackle the chain to shank and add a trip line and buoy to the crown.
Boarding
Hard dinghy's can tip over if someone puts all their weight on the gunwale. So only put weight on the floor when boarding or exiting to remain stable. Swimmers can usually re-board over the transom.
Night navigation
Battery powered clamp-on navigation lights (and a torch) makes Jai Dee legal after dark. The port and starboard torch (pictured) stows in the 6" hatch, though haven't figured out what to do with the aft 360 white light on its regulation pole when not in use yet.


Discovered that it's easy to temporarily stow the full sail and rig. Just undo the sail downhaul, with the sail up and all, just pull the mast straight out of the mast step, lay the mast down next to the boom in the boat. The boom, sheet etc is left rigged up. To re-rig I just pick the entire mast/sail/boom up, re-step and secure the downhaul line. This can be done either at the beach (easier) or at anchor.
 |
| Fatty knees with rig temporarily lowered. |
I gradually got used to sailing the Fatty knees, beginning with light airs followed by increasing wind strengths. She sails best on a close reach in 10-15knot winds. 20 knots is maximum for this sail and wind must be spilled. Often sail from the Palleranda dinghy ramp, it's a semi-sheltered/open stretch of water. Magnetic Island is about 4km offshore and can offer some protection from 1-3m swells further offshore. I've sailed for several nautical miles along the Palleranda-Townsville coast in 1-3 ft chop and 10-15knot winds and she feels very seaworthy bobbing over the waves like a cork. Heeling about 10 degrees increases windward freeboard too. It's a beamy stiff dinghy, I've never put the lee gunwale underwater as the rig naturally depowers its-self in gusts. Hardly ever had to let the main sheet fly, she just rounds up into it a bit. Small Catamarans, kite surfers and some sea-kayakers share the waters off Palleranda when the winds up. (the sea-kayakers usually paddle to Magnetic Island early morning during offshore calm and return with the daily sea-breeze, not a bad idea for a small dinghy too)
I added a rectangular storage hatch to the aft seat and buoyancy tank. It's big enough to dry stow a day's cruising supplies and safety gear. It's only briefly opened in light to moderate sailing conditions. A waterproof draw string bag is also kept on deck for needed things so the hatches can remain shut most of the time while sailing (as there's no foam floatation in the tanks)
 |
| Fatty knees "Jai Dee" sailing near Townsville Port. |
Reefing down
Photos of Pardey's FN8 Cheeky showed the mainsail rig had 2 sets of reefing points, a halyard and what appears to be sail hoops around the mast. This reefing capability allowed them to sail in upto 25 knots of wind and always return safely under reduced sail if it blew up.
For now in Jai Dee i just trip plan by sailing upwind early on, and pick good weather days to go out. On one trip the wind increased to over 25 knots, it was getting overpowered and was hard to control, so dropped all sail by un-stepping the mast, stowed it all inboard and rowed back downwind. Later my weather app showed maximum gusts of 31 knots had occurred, she cruised back safely under "bare hull" in these conditions.
A proper reefable rig is needed though.
Trailering
The dinghy is solidly built so weighs a little more than your average ply pram dinghy. I can handle its fully rigged and loaded weight on the beach by using 2 fenders as rollers.
Dinghys on Wylo's
Wylo2 (Nick Skeates) Has a nesting dory. When nested the dory takes up very little deck space. When it's assembled it is long, narrow and easily driven either by oars or lug-sail. wylo2 also carried a small pram dinghy and a clinker tender on davits.
Ironbark, a 35foot wylo which cruises some rough cold waters such as Antarctica, Greenland and Patgonia has an 11' Shellback dinghy on the main cabin deck, stowed either upside down or upright, the bow sits beside the mast, with room to get around. Iron Barks Travels has shellback pics and much more. It's a large dinghy with big carrying capacity.
Common dinghy's for cruising yachts
Inflatables - They have good stability (can sit-step on gunwales), high speed long range, handle surf and rough water well. So are good for diving platforms or landing on wilder shores. They can be deflated and stowed down below. However they really depend on the outboard working, as they usually can't sail as backup. Inflatables are notoriously terrible to row in a breeze with chop. Good Inflatables are not cheap and the suns UV degrades the fabric when in continuous long-term use. They can suit part-time or coastal cruisers with shore commitments (as the dinghy can stow in a car trunk and be taken home to garage storage)
"Zodiac" style are the most common type, hard floor or RIB best. Another more recent type is the TakaCat
Pram dinghy's. Have a bow transom (aka cut-off the pointy bow) which makes them relatively shorter and easier to stow while maintaining carrying capacity.


