Monday, November 28, 2011

Port holes 1

A standard wylo2 has 10 portholes. 5 on each cabin-side. Eight of them are 6" (150mm) diameter and the two forepeak ones are 4" (100mm) diameter. They are small size for great strength in open ocean, unlikely to break open when slammed by a huge wave. The designed sizes are carefully proportioned to the boat and look pleasing to a discerning eye. They make up a fair portion of the boats character.
I'm going for simple fixed port lights, which will have some external lexan or perspex on sealant and galvanised through bolted. This is the most economical way to start off and there's little chance of an annoying drip or worse. Also there is no danger of dissimilar metals which could cause electrolytic corrosion.

 (For ventilation I'm counter-acting the lack of opening ports with 3" high hatch coamings to stop deck wash, a large fore-hatch, sizeable opening skylight, 2 dorade boxes, canvas spray dodger on the main hatch etc)

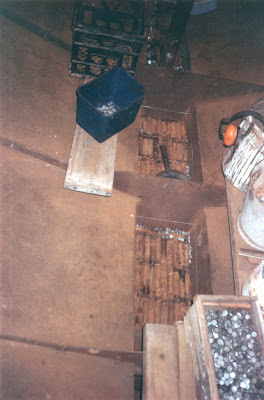
Foreground is the galley port light. Next 2 are for the main saloon.

To make the fixed perspex port lights.
  • The deck and cabin sides were fully welded up first.
  • The portholes were marked/scribed on from the plans. 6" and 4" round templates with center hole.
  • A small pilot hole is drilled at each portholes center
  • Another template with 8 outer fastening bolt holes was made up.
  • The 8 attachment bolt holes were center punched for each port (separate 4 inch port template also made). 
  • Then a cutting jig was created. It has a central pivot point on a slide clamp, attached to an arm with the oxy-acetylene torch on the end with small wheel.
  • The pivot point goes into the center hole and the oxy torch then describes a nice arc just inside the 6" and 4" diameter scribed lines.
  • Small angle grinder or wheel to trim up the edge to scribed lines.
  • 1/4" attachment bolts holes were drilled out.


Next phase - get perspex cut and drilled.

Other options are possible.  Nick used his salvaged bronze portholes. Some rubber and small hose around bolts was used to isolate the steel from the bronze to stop electrolysis from occurring. Some of these are opening ports.

Some wylos have 1-2 opening ports at the forward end of the cabin/fore peak. This allows air to blow straight in there, but you could get some water/rain in there onto the bunk  if not attentive.

I've seen a wylo with home-made stainless opening ports machined in a sugar mills workshop during the slow season.

As mentioned previously the aft bunk/stern opening port hole is a good optional extra if you have the time-budget. Tai Taki 2s transom port can be left open most of the time while on board. Its under the overhanging transom and is usually to leeward when on an anchor or swing mooring.

My transom port is 7" diameter, just astern of the quarter berth area. It's well above the static waterline (hopefully the careened waterline too). No bolt holes are drilled yet.. If i cant find a suitable old opening port hole, then  the plan is to make an internal opening port with galvanised frame. If you are in a hurry to launch then it probably would be better to not have this port hole (as per the plans).

Another reason for fixed side ports. I met a yachty who owner-built a 50ft yacht with side opening ports. She was tied up to river piles. While the crew were away ashore the tide went out and the boat fell over downhill away from the piles, when the tide came back in the yacht filled up via the open ports and the hull was totally submerged. The yacht was salvaged, pain-stakingly repaired and sold. 

As a result of this story I'm trying to confine anything that opens to above the extremely heeled careened waterline. I'm sure it's possible with a wylo2 as nearly all the hatches, dorade pipes etc are inboard around the center line. Omitting the port side lazarette hatch entirely could also make the hull inherently safer and faster-easier to build. I have a large lazarette hatch coaming already in place,  its advantages are in port ventilation and easy access below. It will have to be kept dogged down at sea or when unattended in tidal ports.
Wednesday, November 9, 2011

Ballasting

Wylos are usually ballasted with scrap steel but some have used lead. I chose steel partially beacuse 2 cartons of beer in exchange for several tonnes of worn-out excavator track pins was a bit cheaper than a few grand for lead ingots. It was about another carton for heaps of scap steel punchings from an engineering shop. Thanks to those two businesses for helping keep the ballasting cost down. The wylo35 plans come with the scrap steel ballasting option as standard. (But more so because its designed for scrap steel. See the end of this post for thoughts on lead).

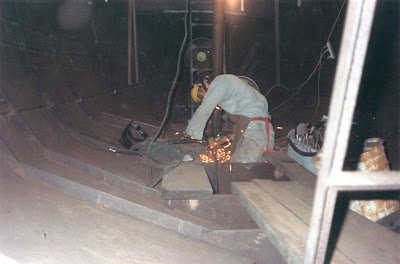
Bit of pre-ballasting preparation. Grinding a weld near the 4" pipe mast support post, which runs from the steel deck head to the 12mm keel base. A nice structural member to transfer mast compression to the keel. It also helps prevent the wide flush deck from compressing inwards in the middle (Should handle pitch-poling forces, but havent heard this happening to any wylos as yet)


It took a few trips in a stout ute to bring the ballast to the yard. Old 44 gallon (200 litre) fuel drums cut open at the top were used to move and store the pins. (caution required, old petrol drums with an evaporated half teaspoon of petrol vapour can be very explosive so i aired all drums out for ages, and used a cold chizel to cut tops off) The forklift at the excavator workshop lifted a drum full of pins onto the ute, and the 1 ton utes tray sagged down 6 inches towards the tarmac, the springs groaned, amazing how small a tone of it is. Acceleration was not great after that either and the ute rolled a bit disconcertingly on corners so it was a rather slow trip. Thanks to Kim again for letting me borrow his Tojo its was still ok after all that.
At the wylo yard i unloaded by hand into other 44gal drums next to the boat. (loading directly into the hull would have prevented double handling). The punchings were moved in small 5gal oil cans without a top, again try to move one of these...

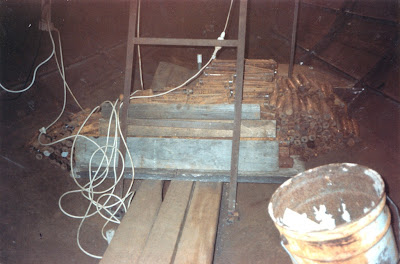
Much later it was time to ballast the keel. The pins were lifted by chainblock in steel pails with about 15kg per trip. Lowered the pails in, then stacked the pins up in the hull fore and aft of the keel.

 
Pins under the companionway hatch.

Once the pins were ready, i hired a set of industrial scales to carefully weigh pins/punchings in an old plastic crate. A tally sheet was kept so i'd always kow how much had gone in, so it could be spread evenly and when to stop - 4,840 lbs (2,195kg) for my 35 foot fixed keel. (its less at 4,280 lbs for a 32 ft Fixed keel).


The track pins were laid fore-aft in layers. each pin nestles between 2 pins below and any odd corners or ends were packed with punchings (about 3/4" to 1" diameter). The 4" diameter keel leading edge pipe is filled with punchings only.


 The ballast is laid between frames F3 (aft end of forehatch) and F6 (fore-end of galley) in the fixed keel wylos.


Steel punchings in 5gal tins. Note the top of the ballast line chalked in on the keel box. It took a few days and a few sore muscle days after that.

Once all the ballast was inplace and close to the ballast top line, I fitted 5mm steel plates over the top of it, snug against the ballast below. It was fully welded down. A small bilge sump was fitted at F6 (lowest part inside hull for the bilge pump intakes)

A filler pipe foward allowed some oil-diesel mix to be poured in to prevent any corrosion in future, but as the ballast box is hermetically sealed by welding  it probably isnt all that necessary as the ammount of oxygen remaining inside the box  is small. (There is a school of thought that cement mortar, (or even artificial goop) between the pins is a good way of starving oxygen, holding pins etc in place and preventing corrosion. It seem to work well in reinforced concrete structures..Any comments on this one?)

If i recall correctly, the steel ballasting of the centerboard versions may be slightly different due to the shallower keel. In these hulls the ballast extends further aft to frame F7 which takes out the small keel water tank present between F6 and F7 in the fixed keel versions.

Some builders have used lead (Pb) as it takes up less space than steel. I visited a wylo32 being built near Cairns, Qld years ago. Lead ballast was used and the ballast lid plates were about a foot lower than my one. This left significant storage space in the keel below the floorboards, enough for 5gallon jerry cans etc. You would have to consult with the designer Nick Skeates before doing anything like this.

The Cairns wylo was to be junk rigged with 2 unstayed masts, so maybe it has extra top weight to conteract? I stuck exactly to the gaff rig plans Nick sent me, messing around with core design parameters like the ballast distribution was too much to risk. My take on lead ballast - It would lower and concentrate the center of gravity, this would mean a stiffer hull - able to hold sail for longer maybe go a fraction faster..but the hull would also snap back from rolls a bit more agressively making a less comfortable motion in a seaway. Its not a racing boat so i would go for more comfort at sea to arrive in better physical shape. The other problem with lead, is that if you fill all that storage space with water/fuel or other heavy items it may help overload the boat, increasing displacement far beyond the designed displacement with other negative effects to performance like cut passage speed down. It would be interesting to hear what others  think on this design subject.