So decided on 4x2" wooden beam rafters to go across and 64 mm steel "top hat" purlins to go on length ways. (This is the method that most of the boat shed roof is built and proved category 3 cyclone proof, 180 km/hr winds). It would take a few weekends and "mid winter" up here is perfect for roofing jobs (16 - 27 C) and no rain.
Recycled materials were to be used as much as possible. So the best thing to look for first is the sheet iron. Found twenty 12 foot long corrugated iron sheets in good condition at the local recycled timber yard "Full circle timbers" in Townsville, the price was about 1/3 of new sheets (it was $310 for a 3.6 x 13 m roof area). The ute slowly carried the full load a few km to city base, it weighed allot and was up on top of the carry racks so the center of gravity was high. To go 50km on the open highway to the boat yard i took the sheets up in 2 loads, 10 sheets per trip. 80-90km/hr felt safe enough.
Once the roof sheet length was known, the number of purlins could be figured out. Drew up a roof frame plan. Downloaded a Stramit products table, what design spacing's etc in it for various products. 64mm high galvanized top hat with 1mm walls looked strong enough. 5 purlin's each 13 m long should do it (at around 90 cm centers), so 65 meters of purlin lengths required. This gave about 50 cm of over-hang at the ends.
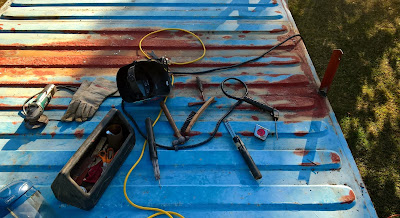
The 30x30x3mm rafter support posts were welded in place. Twelve needed. One side was 6" and the other side 12" to give a moderate roof slope. "Metalfix" paint converted old rusty steel into near new and protected weld joins.
 |
| Welding posts on |
Next trip was 4x2" hardwood beams salvaged from demolished "Queenslander" houses. These cost $4.40/meter. So $110 bought the 5 beams of 4 meters or so length each. They went up in one ute trip and joined the single 4x2 already there.
To get them up on the container's roof, the ute tray was rolled in to make a good scaffold platform about 1m high. which just left 2 meters to lift onto the containers roof.
The M10 threaded rods, boxes of gal nuts and washers cost about $40. The 4x2" beams were clamped on then holes drilled for the threaded rod bolts. About 45 cm (2 foot) of beam overhang was made on the low side, the high side was left open to be trimmed off later.
In the tropics ample roof overhangs are important. To keep downpour rains out and also to shade walls from searing sun heat. But with only 4x2" beams and the 12 foot sheets overhangs had to be limited to about 50-60cm on each side. Too much canter-levered overhang in a cyclone probably wouldn't be good!
Another weekend was time to get the top hat purlins. These are hard to find second hand, so new ones at around $7/m were $520 the biggest cost yet. At the steel retail yards they said they don't cut the 6.1m or 7.5m lengths in half to transport on standard ute carry racks anymore. Delivery cost by hire truck and driver would have been over $200.
So a day that weekend was spend fabricating a front carry rack for the Ute at the wylo yard using some scrap steel laying around.
Started with old 40x40x3mm angles 8" long - these were drilled and bolted to the Toyota workmate (2004) ute's bull-bar mounts with 10 mm threaded rod.
| Front rack attachment |
Then recycled 3/4" galv pipes were cut and clamped together with wood frames to hold them while angling them and lining it all up on the ute. A partial A frame with a T top resulted, which gave good forward visibility (a vertical post would have sat in the drivers line of sight) and a semblance of sideways stability too. Once the dimensions were sorted it was tacked together, then fully welded. End ears also full welded on. The top cross bar is 0.9 m wide to take long roof iron sheeting if required.
| Front rack - semi A frame with T top. |
 |
| 3 racks on ute - carrying 6.1m long top hats |
Lashed a pipe fore and aft to brace the front rack in that axis, then went for a road test at 90km/hr. No harmonic troubles or wobbling at top speed. Chose the round pipe as its also an aero-dynamic section. (My first-ever front rack on the 1970 Ford XY falcon in the 1990's was a bit rougher, built with square box sections and angle steel, it worked well but was aerodynamic as a brick.)
So armed with 3 carry racks covering a 5m length of the ute, returned to "Orcon" steel retailers and the "Stramit" top hats were loaded on easily. They weighed 119 kg, so took it easy below 90 km/hr to deliver to the yard. Again the ute tray - scaffold system made it easier to hand lift the top hat purlins up on the container's top.
 |
| stabilizing pipe from from rack to cab rack |
The third weekend's work involved getting the top hats installed over the rafter's. I made a 12 foot long measuring stick (sheet length) , drew up some profiles of the edge details in the office van (could add a barge board and rain gutter later), to figure out the distance between the two outer purlins.
| "The boat yard office" |
The lengths were joined with 20 mm steel self drilling tek screws with 30-40 cm overlap. 6.1 m lengths did not quite make the 13 m required so had to add a 166 cm final piece to each purlin length. This extra time and work could have been avoided if 7.5 m lengths were purchased instead.
 |
| Outer purlins in place |
Next the 3 infill purlin's gaps were figured out, 85 cm centers gave even spacing. Used a red industrial crayon to mark things up, it was very easy to see on wood or steel. The infill pulin's were much easier, faster and safer to fit because of the solid container top to walk on.
 |
| 13 m long Purlins all in place |
Cyclone proofing was to add builder's strap over some of the purlins on the corners and edges of the roof frame. A cyclone could possibly rip a purlin (and whole sheet roof) off with out this extra fastening. It's held to the wood beam by 4 x 25mm wood tek screws. The strap also spreads the loading out over a wider area of purlin.
 |
| cyclone strap on top hat purlin |
Roofing
Spent a day to get most of the sheet iron on, 12 foot sheets proved to be a manageable size. The first sheet was carefully squared up to the purlins. Used a 1.2 m straight edge and marked screw positions with the red crayon as each sheet was aligned.
Hex head tek screws (self drilling) were used, one every 2nd corrugation.
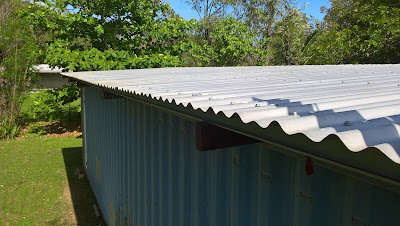
The completed roof made a world of difference inside the container. DRY and COOL. It was also up just in time for a very un-seasonal unusual heavy rain event in October over 300 mm in a week! (should've been the dry season but weather patterns seem to be getting more unreliable lately) The photo below also shows how green the lawn and trees suddenly became!
 |

