Friday, November 21, 2025

Zero Shadow Day

 We just had our zero shadow day on the 19th November in Townsville. At solar noon, the suns zenith, vertical objects such as poles cast no shadow at all. It's a hot weather season too with 32-35C humid days and 24-28C very humid nights (Known locally as the "build up" or "silly season") (We are a coastal city, it gets more extreme inland in 'the outback')

Zero shadow days only occurs in the tropics, between the tropic of Capricorn (Lat 23.5o S) and Tropic of Cancer (Lat 23.5o N). In Hawaii it's known as "Lahaina noon" meaning "cruel sun".

It occurs twice each summer for my latitude of 19o15' South. The first is when the sun is moving south (Indian - "Dakshinayan"), the sun's travel stops at the tropic of Capricorn at our summer solstice around 22nd December (Near Rockhampton, Central Queensland) then it begins to move north again (Indian - "Uttarayan"). Our 2nd zero shadow day of this summer is on 22 Jan 2026 at 11:59am. After that date the sun's declination is north of our city, it reaches the equator (and equinox) on March 20, 2026. 

It's probably no coincidence that most of Northern Australia's tropical cylones occur in January, February and March while the hot overhead sun (and longer days) heats up the Southern hemispheres oceans each year, (in our case it's the Coral sea's temperature to 30C or more) which equates to plenty of stored energy to power cyclones (also known as Hurricanes or Typhoons in other parts of the world).

I found a great app for my android phone "Zero Shadow Day finder" (ZSD icon). It was created by Alok Mandavgane, for the public outreach and education committee of the Astronomical Society of India.

It gives the two zero shadow days of each tropical summer (wet season) for a given location within the tropics. There are also other neat pages in the app, including an Introduction description page, a map animation and a 3D sun visualizer with a time-travel function. 

Tuesday, May 13, 2025

Hand-bearing Compass

Bought a secondhand classic "Carac" Japanese hand-bearing compass (HBC) recently.

Carac hand-bearing compass

 It was made in Tokyo, Japan about 50-60 years ago to a high quality professional mariner's standard.  They are very accurate to 1 degree and have a "night light" as well. A foam padded plywood box stores it safely. I liked the bakerlite pistol grip with light trigger and magnifying prism roll-knob. 


Taking a bearing, prism raised

Stored in box, prism lowered

The sighting prism/mirror magnifies the card's degree markings making it easy to read with no parallax error. The card also has 4 basic cardinal points (N,S,E,W) with intermediary cardinal marks (NE, NW, SE, SW) when viewed from above.


Night-light workings inside the pistol grip

In 1988-89 i had a HBC similar to this aboard my Endeavour 24 keelboat, bought secondhand from an ancient mariner onboard a wooden gaffer at Coff's harbour, NSW. I kept it after the sale of the E24, however the compass went missing in the mid 1990's. 


So this compass is a nostalgic replacement and reminds me of the 20th century's navigation era before modern electronics existed.

The "Carac" brand isn't produced now, (as they were taken over?) by "Saura" co Ltd, Tokyo a manufacturer of binacled large commercial ship's compasses, and they still make a vertical grip prisimed hand bearing compass in a nice wooden box today. Saura hand-bearing compass

Found an advertisement online, mine looks very similar, so presuming my one is a Model No N-2000 


Advertising card


Sunday, April 27, 2025

HPV Salsa spirit stove

The "HPV Salsa" is my hot breakfast spirit camping stove at the boatyard. It runs on the same principles as the Maxie stove in the previous post. 

It only outputs 1kw (3,500 BTU) maximum heat, but thats ok for one man frying up bacon, eggs and tomatoes, onions and sausages etc. I usually turn the heat down once these are cooking well.

It's also ok for small stew pots, boiling veges/pasta/rice or reheating food.

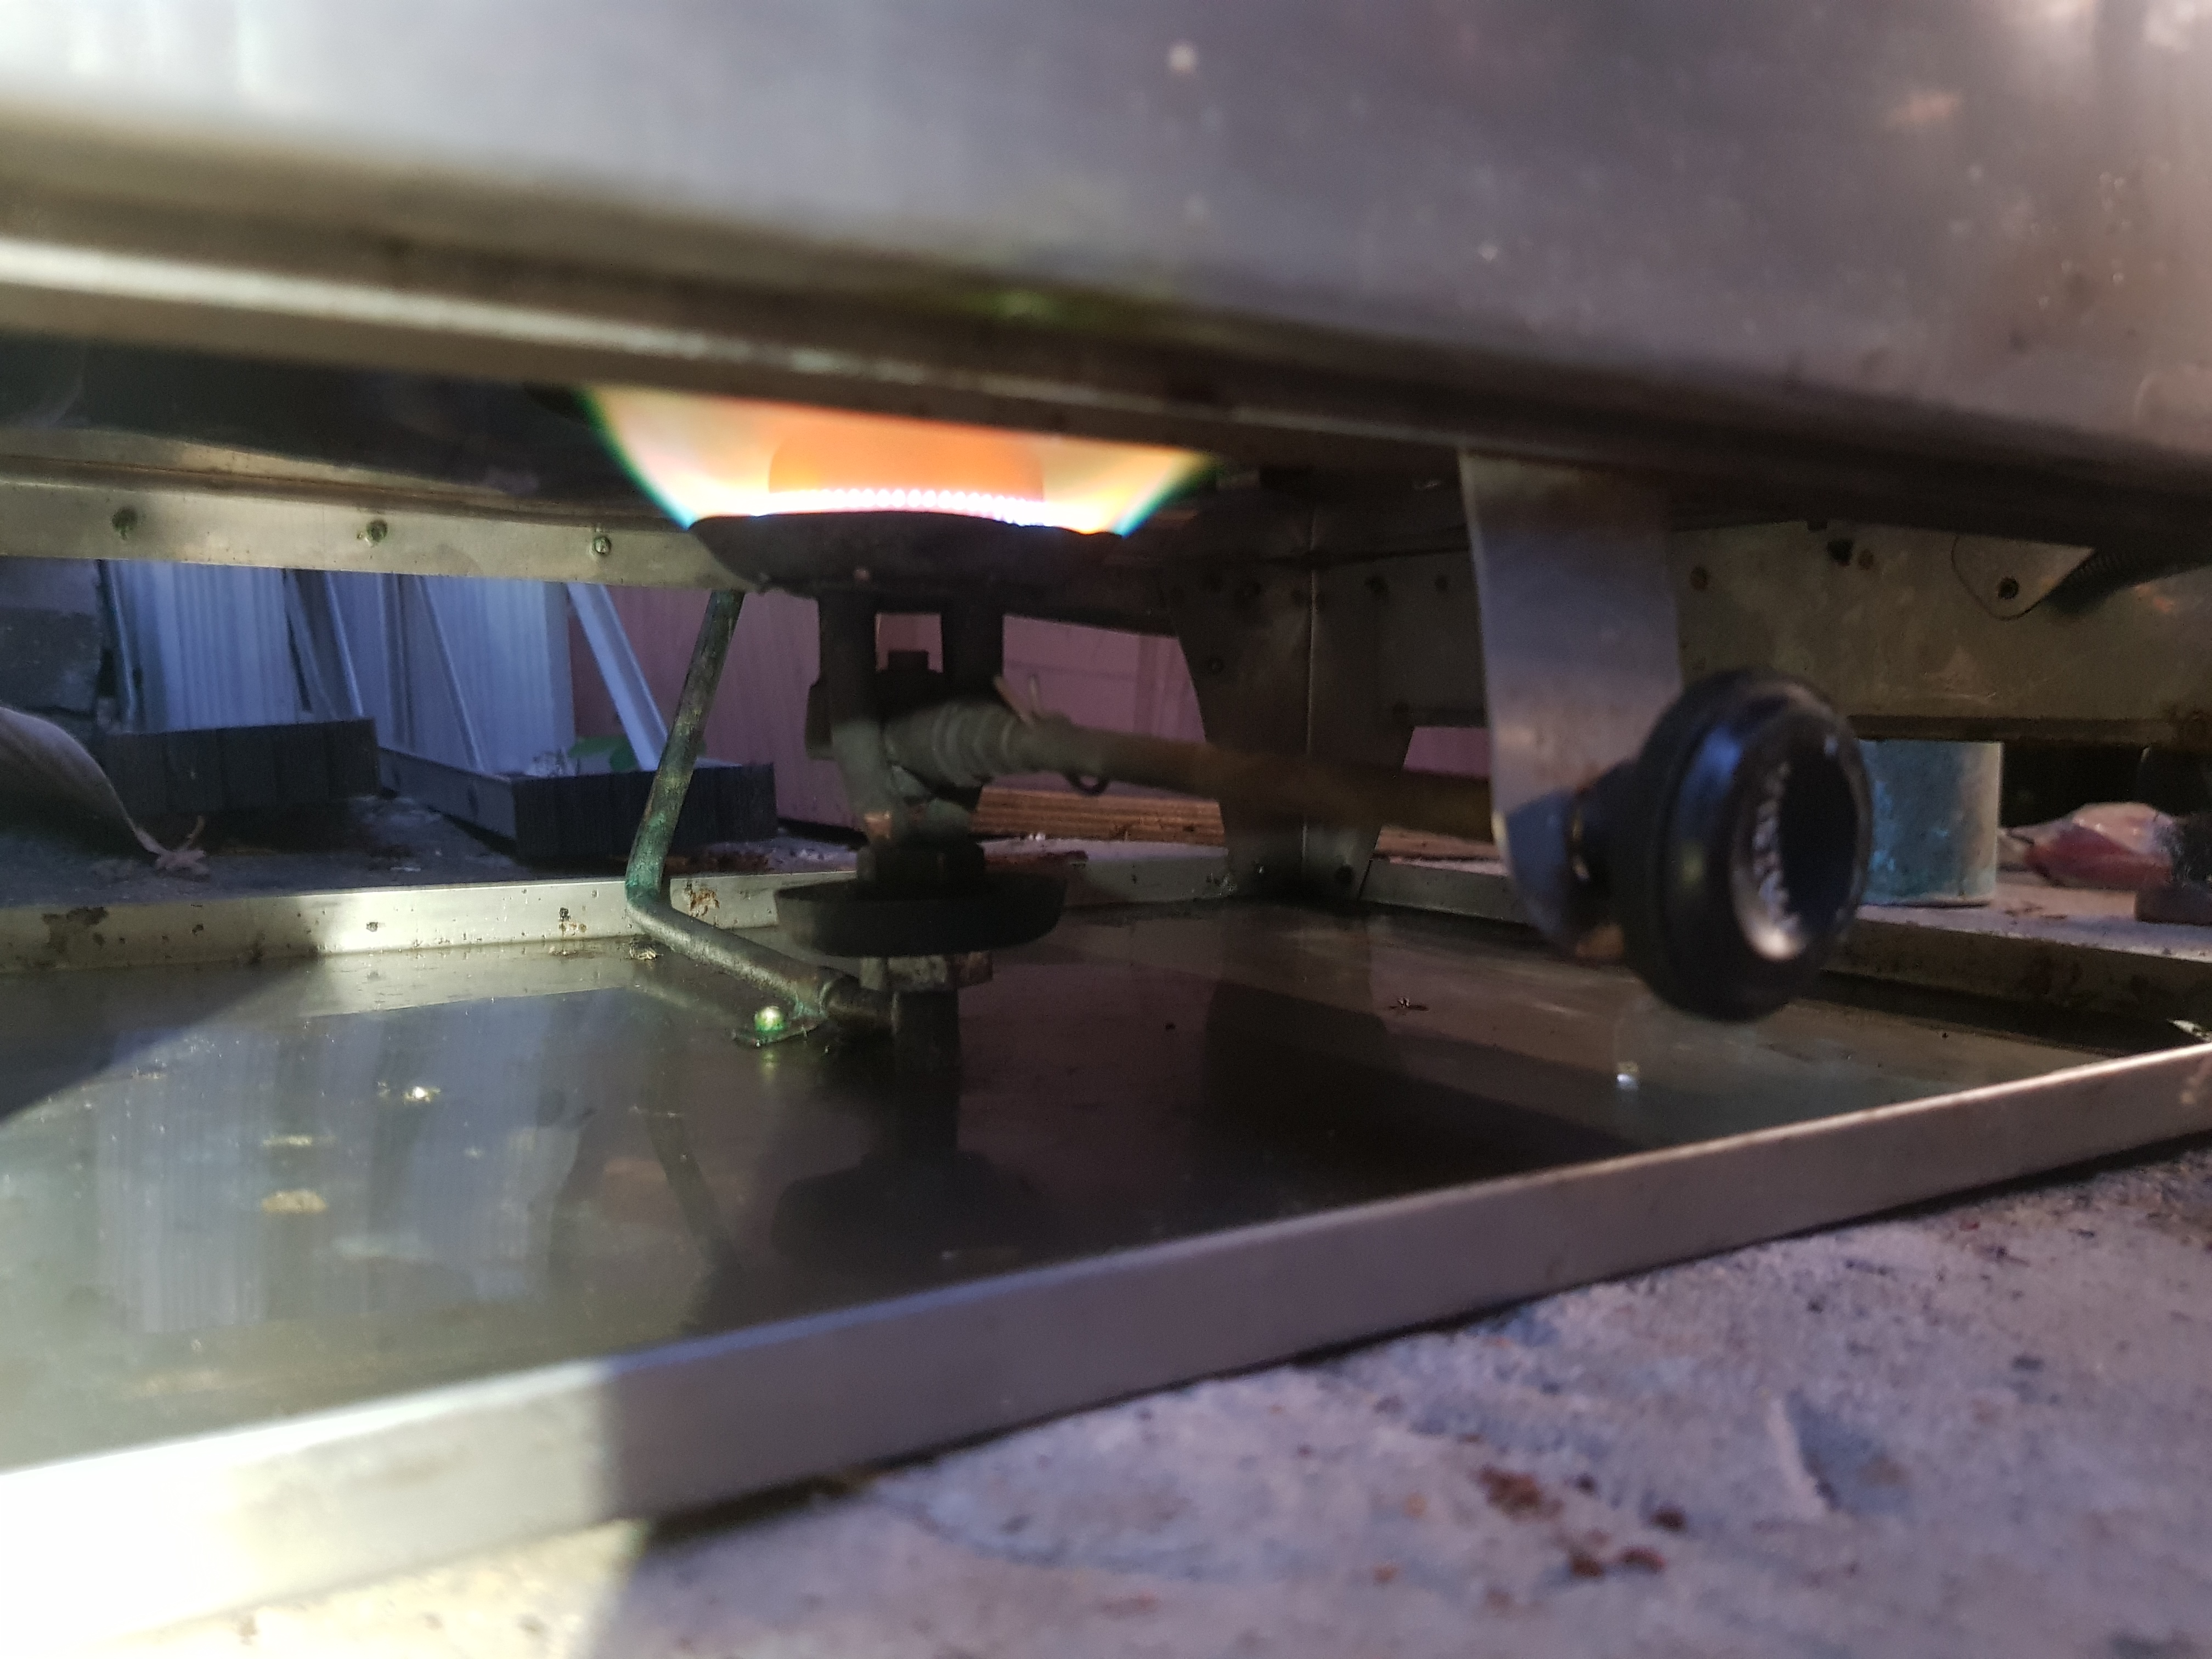
HPV Salsa stove burner


Salsa - Fry pan breakfast

The Salsa is German made and is good quality. The only maintenance is keep it clean (rarely have to clean the fuel jet/needle as well) I bought it  from Reimo Australia. 

Dinner cooking, 1kw Salsa can boil veges/pasta (Butane 2kw for sausages)

This is a detailed look at the Salsa Salsa regulating alcohol stove - MTO


Maxie 2 burner spirit stove

 Picked up an old Maxie marine spirit stove recently.

They were made in Sydney in the boat building heydays from 1950's to 1990's? There are no date stamps etc, so guessing it's 1970's - 1980's. (40-60 years old). This is because my 24ft keeler "Pablo" had one just like it in 1988, and that boat was about a decade or two old then. That stove kept me well-fed for about 6 months living on board.

They output plenty of heat, the fuel is methylated spirits, which is safer than gas and cleaner than kerosene.

If  the fuel spills it evaporates away quickly. If it spills and catches fire, a water bucket can extinguish it quickly.

They are gravity-fed with generator tube pre-heaters which gassify the spirit. It burns with a clear to blue hot flame which can be regulated from a fast boil down to a simmer.

However they must be operated correctly. Re-fueling/top up only when stone-cold and with the burner valves closed off. (best done early in day, before any cooking) The stove has bakerlite adjustment knobs at the front for easy fuel control.

The start up procedure/pre-heat takes a couple of minutes.

  • Open fuel valve and 3/4 fill the pre-heat bowl under burner.
  • Close valve
  • Light fuel and pre-heat burner
  • When fuel is nearly burnt off, open valve to start gassified burner

I usually have a pot, pan or kettle on over the pre-heating burner. Just have to keep a close eye on it to catch the open-valve timing just right.

Maxie marine stove, cleaned up and maximum burn (about 2 kw, 7000 BTU each, mid range)

Easy to see flame at night (almost invisible in daylight, so hand over swipe heat test needed)


Boiling the kettle, the flame settles down nicely

Burner detail (before cleanup)

Front plaque (instructions) and control knobs (before cleanup)

Each burner output is about 2kw (7000 BTU). For comparison Trangia, HPV Salsa camp stoves output about 1 kw (3500 BTU). Coleman shellite campstoves, kero pressure  and LPG gas burners can output around 3kw (11,000-12,000 BTU)

These early gravity-fed designs are simple engineering. There's no pressure tank seals to leak, no pressure pump to go wrong, and no-jets with jet-prickers to worry about. The Maxie's fuel tube has a wick inside it to moderate fuel flow and it lasts for ages. The fuel line joints appear to be precision metal seals.

This stove had sat unused in storage for many decades. Before that it was used allot on a boat.  I took a bottle of spirit and a lighter over there. It took only  5 minutes to fill the tank a little and get the burners fired up agin.

At home i unbolted the tank, swilled it out to clean it and the fuel tubes. Bolted the tank back on, new fuel in and it worked almost perfectly again. A bit of spit and polish later and she looks only 10 year old again.

Some people report "flare up's" when lighting these stoves. That may be cause by opening the fuel valve too early or too much on start-up. Usually Maxies have heat resistant aluminium sheeting surrounding them and the side-deckhead above for safety if it flares up or spilled fuel is on fire. 

They are "stand-alone" stoves. Unlike the modern gas stoves with all the expensive and complicated gas lines, gas bottle lockers, valves and gas sniffers wired into the 12v electrical system. Maxie stoves don't explode the entire cabin and boat, a "flare up" etc is a manageble sized problem.

Other Pro's. The fuel is sustainably distilled in country from agricultural crop-waste, not imported. It comes in re-cyclable plastic bottles sold in supermarkets and hardware stores. 

Con's. They are a bit more technical and a bit less forgiving than an Origo spirit burner. Maxie parts are not made any longer (Though the company still exists in Sydney as a fancy marketing ideas office, stoves/local mass-production are long gone) Maybe valve seats/needles need machining if they leak and new wicks go in after decades of use. But they are a great part of Australian nautical/caravaning history and it's a pleasure to fire it up from time to time.

This stove is a basic one and lacks some sea-going accessories. It lacks Pot-holders and there's no swing gimbal to keep it level when the yacht is rolling or heeled over. 

Some Maxie stoves sold online recently have these extra features, 

Maxie marine stove with sea-gimbals and pot holders, NSW.

I've also seen some of these stoves re-badged as "First Mate", they look almost identical. If you know about the history of these or any maxie stoves please comment below.

 Will keep my search lights on for spare parts/stoves. I've now got a small inverter welder that does stainless steel welding, so might fabricate these bits later if nothing 2nd hand turns up.


Thursday, April 10, 2025

Origo 3000 stove

 Aquired a 2nd hand Origo 3000 spirit stove. It is made from stainless steel, has 2 burners and a basic pot grate (no pot holders or gimbal). The previous owner used it to travel around Australia in a van.  They don't come up for sale locally very often here, so was very happy to get one at a good price.

Boiling a camp kettle


It is unpressurized, which makes it safer and easier to maintain and use. The burner canisters hold 1.2 litres of fuel each and will run for 4.5 hours on high and 10 hours on low. It is fairly heavy once the canisters are full.

The stove is quite compact in size, so fits into most small boats (22 - 35 footers) (larger vessels might prefer large oven stoves) 

Left burner on high, right burner on low setting

Fuel canisters and burner control ports

Normally Origo stoves come with 3mm neoprene canister covers to prevent evaporation of fuel when not in use.   These were missing so i made my own up from door sealing neoprene from the local hardware store.

The flame output can be controlled accurately with the twist knobs. It is very easy to light with a long gas BBQ lighter.

Pot grille and flame spreaders on burners

It boils the kettle silently, only the kettle bubbling noise is heard. It takes about 10-12 minutes to boil a litre, with it's 2kw (7000BTU) burner, a bit slower than 3kw (11,000BTU) LPG gas or shellite burners.

However safety is important, it's unlikely that it would explode/burn the boat down like gas/shellite is capable of doing. Meths can simply be extinguished with water. If meths is spilled it simply evaporates upwards and away leaving no residues. It is hard to see a meths flame by day, so passing a hand over it quickly determines if its going or not. If it blows out accidentally, there is zero danger, it's simply out (gas continues to flow and builds up in bilges...)

It is also far simpler/cheaper to set up and maintain by a DIYer. (Gas fitters and gas certificates are a significant cost)

It is important to follow the operating procedures. The biggest danger with an Origo is re-fuelling the canisters. Only do this when they are cold and do it outside the cabin. They should be topped up to full capacity each day or while anchored, (eg mornings before daily use) holding them at 45 degrees until 1.2L is reached.

The other main reason for meths fuel is availability is usually good in most places (except PNG..) and it stores easily in plastic containers. It is often produced locally as well. In Australia there are a few facilities that turn agricultural crop by-products into ethanol fuel, so it's sustainable and keeps jobs/money etc in country.

For more info, cooking performance K10 blog - Campervan fittout, Origo stove test

Cooking method - Get the 2 litre hot water kettle on first, then use the other burner to cook/ reheat the meal, by the time thats done the waters boiled for a cuppa, thermos and washing up.


Tuesday, January 28, 2025

Wylo 35 gaff centerboard build for sale in Wellington, NZ

Just came across this wylo 35 build for sale in Wellington, NZ. Asking NZD $12,000. She's a gaff rigged 35 foot centerboarder (3' 3" draft). She has tan bark sails and a 30hp Kubota diesel engine included. Probably be better than building a deep sea world steely from scratch, would save years and allot of work. 

Wylo 35 project, NZ. https://www.trademe.co.nz/a/motors/boats-marine/yachts/other-yachts/listing/5138319803

 Update 27th April 2025. An Australian member of the wylo2 io forum flew over "the ditch" checked this vessel out and it is as advertised. The steel was pre-blasted and primed, it did sit outside for 5 years though.

NZ is the birthplace of Nick's original wylo2 design, and there are quite a few other wylo owner/sailers,  old gaffers and talented classic boatbuilders/sailers around there, who are concentrated into several areas (Northland, Auckland, ?Nelson sounds) . Travelling/trucking distances are not as great in NZ like here in Australia, which should mean less time/money to move the boat to it's new boat building shed.


Sunday, April 14, 2024

Engine room 4 - What sized engine?

 What horsepower diesel engine should go into a wylo 35? (Displacement sailboat)

A general rule of thumb of "3 horsepower per ton displacement plus 3hp" (I read it long ago, in an Alan Lucas book or article somewhere?) seems to be a reasonable formula. 

(Displacement x 3) + 3 = engine horsepower

Also Eric Hiscock (p185 "Cruising Under Sail") confirms this with "3hp per ton" which allows hull-speed to be reached if needed and gives the ability to go against a headwind and sea.

So for a 7 ton wylo35.  (7x3)+3 = 24 HP. That's just the empty displacement though..

Add 2 tons of water, fuel, supplies etc makes 9 tons displacement (9x3)+3 = 30 Horsepower.

Wylo2's designer Nick Skeates states 25 horsepower maximum for the wylo32 footer (6.2 tons displacement), so 30HP for the 6.9 ton 35 footer seems reasonable to me. Going bigger than this would see a significant increase in engine dimensions/weight and costs.

Alan Lucas discusses correct motor sizing in his book "Fitting out mechanically". The engine should "not be too small or too large" for the boat. It's best to run main engines with a fair bit of loading on them. ie Don't just run it to recharge a freezer or batteries (battery charging should only be a by-product of moving the boat along, other means like solar, wind or hydro used to recharge battery's so the engine can stay off)

Most boats have a comfortable "motor-cruising speed" where not too much fuel is consummed but the boat-speed is 70-80% of ultimate hull speed. A wylo35 hull-speed is around 7 knots, so "cruise speed" should be about 5-6 knots.

It's a good idea to be able to go at near-hullspeed for short bursts. This may be what it takes to get through a fast-flowing entrance into a calm safe harbor or coral atoll's lagoon. Engines have limited rated hours for which they can do this feat. For example the Nanni N3.30 is rated to run at full throttle for 1 hour out of every 8 hours run time.

"Over-powering" results in much higher installation/runing costs/repairs and an under-utilized too large engine suffers from this misuse. Large engine boxes enroach on accomodation. They require more fuel, there is more weight aboard and less storage capacity for other things.

"Under-powering" seems to be more common.  Motor cruising speed is too slow, especially if theres a headwind/ head current.  So full throttle is perhaps used too often, resulting in more rapid engine wear and repair bills. Another problem is if your anchor drags in a gale, underpowered boats just can't make any progress against gale force winds, or may even loose steerage way altogether and blow away out of control, not good in some crowded places or near a rocky lee shore.

Some home-built boats are "overbuilt" during construction or fittout, which can raise their displacement above the designed displacement. This must be taken into consideration if buying a second hand homebuilt boats (Not usually a problem with production boats in general, unless they were originally sold at hull only stage).


Sunday, March 17, 2024

Engine room 3 - Marinized diesels

Marinised diesels are usually based on an automotive (car) engine and have a few things added on to allow them to operate in the marine environment.

They are usually lighter weight, more compact, less costly and spare parts are more readily available/cheaper than standard "marine diesels".

Marinised engines have freshwater cooling, either by a saltwater/fresh heat exchanger on the engine or a "keel cooler" outside the hull. As a result the engines walls/housing can be allot thiner and lighter than marine diesels, as very little internal corrosion occurs. 

Kubota (Japanese) diesel engines have a very good reputation and are used in industry and agriculture ashore. If they are marinized properly, they make for reliable and economic propulsion at sea. Spare parts are readily available and are more cost effective than pure "marine diesels"

Nanni Marine diesel engines have a kubota base motor. They are made in France and I've heard that they are reliable, have quality long lasting parts and can supply everything from propellor to controls. The 29HP "N3.30" has a 3 cylinder 1123cc engine and runs at 3600rpm maximum, peak torque is 2600 rpm. It's size dimensions are not too big leaving more room inside.  They have keel cooling option. It runs a 12V 120A alternator, mechanical gear box and maximum 15 degree propshaft angle and weighs in at 145kg.

Nanni N3.30

Nanni also has a larger 37HP "N4.38" with a 4 cylinder 1498cc engine. It runs slower at 3000 RPM maximum and has a wider useful torque curve. It has larger size dimensions and is heavier than the 29HP but is rated for more usage and more hours per year than the 29HP. 

Beta Marine (UK) might be a good option. The Beta 25HP   has a 3 cylinder 898cc Kubota , weighs 113kg and often swings a 14" diameter 3 bladed prop (but it's best to supply boats specifications for correct prop) . The Beta25 is very compact and serviceable parts (oil filters, electrics etc) are easy to access.


At least a couple of wylo's have Beta Marine engines fitted. There is a distributor/service center in Sydney, Beta diesel Australia.

Witchards Marine (Sydney, Aust) make WM28. , 3 cylinder Kubotas with larger 1123cc displacement, larger size dimensions and swing a slightly larger prop. (The WM22 is a 898cc but 22 horsepower might not be enough for a wylo 35?)

 For those with technical skills and a flair for DIY, car engines can be marinised. Nick used his van's petrol engine. Heard of a VW golf diesel installation too.


Wednesday, January 10, 2024

Kerosene pressure stove

 Bought a secondhand "Handi" stainless steel kerosene stove for wylo, around 1980's vintage.

I heard about it through a mate on the Investigator563 online forum, for sale in Newcastle, NSW. (1600km south as the crow flies) Contacted Gordon the seller, he told me it was removed from a yacht during refitting/upgrade, the yacht had done a 6 year circumnavigation with this stove. It had sat in the shed over 10 years. It was shipped up north by land and arrived at the couriers base in a nice plywood box that Gordon had made up.

Two burners are on top and a third burner is inside the oven. It has adjustable pot fiddles and came with accessories/spare parts and a separate large kero tank attched with a flexible hose.

After cleaning it up a bit, it all connected up and it fired up first go!! (must have been well maintained, thanks again to Gordon).  


To operate it involves pressure pumping the kero tank with a bicycle pump, preheating the burner(s) with methylated spirits (alcohol) and opening the burner valve knob (s). There are preheating cups under each burner and it came with a neat little alcohol bottle with long spout.

Kerosene is a safe fuel onboard as it takes allot to ignite it, but once lit it has a very hot burn. Kero also stores well for ages and takes up less space/weight due to high calorific content. Kero is readily available in remote ports too. The only cons are, it takes a few minutes to light up, some people don't like the smell of it and it has unusual maintenance requirements compared with gas. 

I want to steer away from propane gas onboard due to explosion safety hazard, bulky large gas bottles on deck, and high cost/lack of of refills in some remote places (also different incompatible gas fittings overseas etc)

Kero stoves like this were once popular back in the bygone era on remote outback off-grid cattle stations (ranches). They also had kero refrigerators, kero heaters and kero blowlamps. It was the fuel of choice before the modern "propane gas" (and gas pipeline) era. 

I priced the new modern kero equivalents of my Handi stove (eg Taylors in UK) and they cost  thousands of dollars new. My old one represents good value then. 

Handiworks factory began production in the 1930's, was located in Brisbane, Queensland but closed down late 20th century. The burners etc are essentially the old kero "primus" type which are still made in places like India.


Another second hand buy i made locally was a 1950's Primus No1 kero single burner pressure stove. It's not running and needs some fettling (new pump cup, maybe a burner head). It's similar to the one Sir Edmund Hillary and Tensing Norgay used when they summited Mt Everest for the first time.


On a wylo this type could be fitted to a gimballed heat resistant box (like on wylo2 "Io") 


Saturday, February 25, 2023

Dinghy trailer

Recently did some steel fabrication at the wyloyard workshop. Upgraded my Fattyknees8 trailer by adding winch and an aft keel roller, so the strenous dinghy retreival heave-ho onto the fairly high converted 6x4' box trailer is no more. Just a satisfying and easy click-click click of the winch to get the dinghy onto the trailer now. Should look after the old shoulders and back too. 

More detail is in Waterways - Fatty knees trailer upgrade/maintenance


Wednesday, November 20, 2019

Concrete floor in workshop

The workshop originally had a dirt floor but this got too muddy in rain.

Decomposed granite or "Deco" as it is known locally was spread out over work areas for a solid surface to work on (also used for driveways)

Years ago the workbench and caravan annexe areas were cemented  over when some free leftovet concrete from a contractor was available. These made a big difference to workability.

Last week some gaps in the workshop floor were concreted over. Prep was to clean loose gravel off the floor and set up straight wooden edges. I hand mixed concrete with a shovel in a wheel barrow, and plastered it onto the ground about 20 mm thick, it may not seem much but the 'deco' base is fairly hard, already compacted and was about 50 mm thick. The test slab under the workbench has stood up to a couple of years of bashing on the workbench no worries.


The new floor makes it easier to get around and reduces the ammount of dirt tramped into the shed.


Tuesday, November 13, 2018

Side tracked by a trailer

Sorry not many posts of late, however some kind of boat-associated building is going on at the yard.

Fabricating (and re-designing) a new boat trailer for TS "Teria". The old trailer gave up the ghost over a year ago, nearly right where the boat is blocked up now, it picked a good place to depart.

The new trailer is about 70% done -  next up are side bunk posts and clamps. The brakes, axle, leaf springs etc are refurbished and ready to go back on.


So here's the link to the boat trailer build

Update 25/2/23:  The "Teria's" trailer was completed in October 2021. It works like a charm compared to the original. The longer drawbar is key, now the boat mostly floats on and only has to be winched up the last bit. Just have to be aware of low tides and end of ramp drop-off's (usually marked on pontoon, or can find it with an oar or boat hook).

Friday, September 15, 2017

Shed extension #5 (Container roof)

The container's new roof had to be strong enough to withstand a tropical cyclone or two and be built by one person. It would help transform the leaky container into a dry hut.

So decided on 4x2" wooden beam rafters to go across and 64 mm steel "top hat" purlins to go on length ways. (This is the method that most of the boat shed roof is built and proved category 3 cyclone proof, 180 km/hr winds). It would take a few weekends and "mid winter" up here is perfect for roofing jobs (16 - 27 C) and no rain.

Recycled materials were to be used as much as possible. So the best thing to look for first is the sheet iron. Found  twenty 12 foot long corrugated iron sheets in good condition at the local recycled timber yard "Full circle timbers" in Townsville, the price was about 1/3 of new sheets (it was $310 for a 3.6 x 13 m roof area). The ute slowly carried the full load a few km to city base, it weighed allot and was up on top of the carry racks so the center of gravity was high.  To go 50km on the open highway to the boat yard i took the sheets up in 2 loads, 10 sheets per trip. 80-90km/hr felt safe enough.


Once the roof sheet length was known, the number of purlins could be figured out. Drew up a roof frame plan. Downloaded a Stramit products table, what design spacing's etc in it for various products. 64mm high galvanized top hat with 1mm walls looked strong enough. 5  purlin's each 13 m long should do it (at around 90 cm centers), so 65 meters of purlin lengths required. This gave about 50 cm of over-hang at the ends.

The 30x30x3mm rafter support posts were welded in place. Twelve needed. One side was 6" and the other side 12" to give a moderate roof slope. "Metalfix" paint converted old rusty steel into near new and protected weld joins.

Welding posts on


Next trip was 4x2" hardwood beams salvaged from demolished "Queenslander" houses. These cost $4.40/meter. So $110 bought the 5 beams of 4 meters or so length each. They went up in one ute trip and joined the single 4x2 already there.

To get them up on the container's roof, the ute tray was rolled in to make a good scaffold platform about 1m high. which just left 2 meters to lift onto the containers roof.

The M10 threaded rods, boxes of gal nuts and washers cost about $40. The 4x2" beams were clamped on then holes drilled for the threaded rod bolts. About 45 cm (2 foot) of beam overhang was made on the low side, the high side was left open to be trimmed off later.

In the tropics ample roof overhangs are important. To keep downpour rains out and also to shade walls from searing sun heat. But with only 4x2" beams and the 12 foot sheets overhangs had to be limited to about 50-60cm on each side. Too much canter-levered overhang in a cyclone probably wouldn't be good!


Another weekend was time to get the top hat purlins. These are hard to find second hand, so new ones at around $7/m were $520 the biggest cost yet. At the steel retail yards they said they don't cut the 6.1m or 7.5m lengths in half to transport on standard ute carry racks anymore. Delivery cost by hire truck and driver would have been over $200.

So a day that weekend was spend fabricating a front carry rack for the Ute at the wylo yard using some scrap steel  laying around.

Started with old 40x40x3mm angles 8" long - these were drilled and bolted to the Toyota workmate (2004) ute's bull-bar mounts with 10 mm threaded rod.

Front rack attachment


Then recycled 3/4" galv pipes were cut and clamped together with wood frames to hold them while angling them and lining it all up on the ute. A partial A frame with a T top resulted, which gave good forward visibility (a vertical post would have sat in the drivers line of sight) and a semblance of sideways stability too. Once the dimensions were sorted it was tacked together, then fully welded. End ears also full welded on. The top cross bar is 0.9 m wide to take long roof iron sheeting if required.

Front rack - semi A frame with T top.


3 racks on ute - carrying 6.1m long top hats


Lashed a pipe fore and aft to brace the front rack in that axis, then went for a road test at 90km/hr. No harmonic troubles or wobbling at top speed. Chose the round pipe as its also an aero-dynamic section. (My first-ever front rack on the 1970 Ford XY falcon in the 1990's was a bit rougher, built with square box sections and angle steel, it worked well but was aerodynamic as a brick.)

So armed with 3 carry racks covering a 5m length of the ute, returned to "Orcon" steel retailers and the "Stramit" top hats were loaded on easily. They weighed 119 kg, so took it easy below 90 km/hr to deliver to the yard. Again the ute tray - scaffold system made it easier to hand lift the top hat purlins up on the container's top.

stabilizing pipe from from rack to cab rack
After use the front rack was quickly removed and hung up on the workshop wall on nails out of the way. (The back rack is also demount-able)

The third weekend's work involved getting the top hats installed over the rafter's. I made a 12 foot long measuring stick (sheet length) , drew up some profiles of the edge details in the office van (could add a barge board and rain gutter later), to figure out the distance between the two outer purlins.

"The boat yard office" 
All the top hats were fastened  to the wood beams with 25 mm wood tek screws. Just the occasional one to locate an hold at first, and later all the screws were sunk with the variable speed drill. To get through the 1 mm steel a small pilot hole was drilled with a second drill.

The lengths were joined with 20 mm steel self drilling tek screws with 30-40 cm overlap. 6.1 m lengths did not quite make the 13 m required so had to add a 166 cm final piece to each purlin length. This extra time and work could have been avoided if  7.5 m lengths were purchased instead.

Outer purlins in place

Next the 3 infill purlin's gaps were figured out, 85 cm centers gave even spacing. Used a red industrial crayon to mark things up, it was very easy to see on wood or steel. The infill pulin's were much easier, faster and safer to fit because of the solid container top to walk on.

13 m long Purlins all in place

Cyclone proofing was to add builder's strap over some of the purlins on the corners and edges of the roof frame. A cyclone could possibly rip a purlin (and whole sheet roof) off with out this extra fastening. It's held to the wood beam by 4 x 25mm wood tek screws. The strap also spreads the loading out over a wider area of purlin.


cyclone strap on top hat purlin


Roofing

Spent a day to get most of the sheet iron on, 12 foot sheets proved to be a manageable size. The first sheet was carefully squared up to the purlins. Used a 1.2 m straight edge and marked screw positions with the red crayon as each sheet was aligned.

Hex head tek screws (self drilling) were used, one every 2nd corrugation.


The completed roof made a world of difference inside the container. DRY and COOL. It was also up just in time for a very un-seasonal unusual heavy rain event in October over 300 mm in a week! (should've been the dry season but weather patterns seem to be getting more unreliable lately) The photo below also shows how green the lawn and trees suddenly became!


Monday, July 10, 2017

metalfix maintenance

Lately i've painted on more "metalfix" to preserve and maintain bare steel surfaces. Hes'e some of what what a 5 litre tub of metalfix can cover. it costs about A$200 for a pot up here.

"Metalfix" is a water based rust converter primer, it should slow the rate of any corrosion greatly, especially on lightly rusted surfaces. It quickly brightens up the workspace and makes is much more pleasant to work in. It's intended to be a construction coat only, at the end of the day only a good sand blast with good coatings can be used to go into extended salt water use.

Parts of the wylo hull

A keel tank before treatment, looking down onto 12mm keel base plate

The bilges and keel tanks below floor sole level


Treated the decks. Rust pitting chipped out first. Decks are the most venerable part of  a hull under construction  to rust pitting. If bare steel building suggest metalfixing early on. Better yet get pre-sand blasted and primed steel sheets from the supplier - it may cost more initially but is well worth it in the long run.


The aft peak
The bow and bow rail

some metalfix to the quarter
The ends of the hull get a bit of rain on them that blows in from time to time, any moisture on steel increases corrosion rate so brushed some metalfix on these areas to preserve them.


The 40 foot containers roof

Not knowing anything about sea containers..in 2010 i bought an old cheaper one for 4k (as opposed to a good sandblasted and painted one for 7-8k)..maybe a mistake in the long run.

About 6-7 years later, the containers roof was rusting through and leaking. So have used metalfix and fibreglass to cover the holes. Each rusted area was heavily chipped with a weld hammer and wire brushed, this makes a better key for the paint and glass.

Metal fix and fibreglass to seal holes in container roof

Rusted area in foreground, over-roof going up in background
Started building an "over-roof" too. This involves a frame of short angle steel posts welded to the container and wood 3x2" beams bolted to the posts. recycled corrugated iron covers it. It keeps the actual container roof dry too which should further prevent the  rust reforming.

Making support posts up from scrap 30x30x3 angle. Metalfixed them to look like new.
 Drill press and a bench made from an old house door.


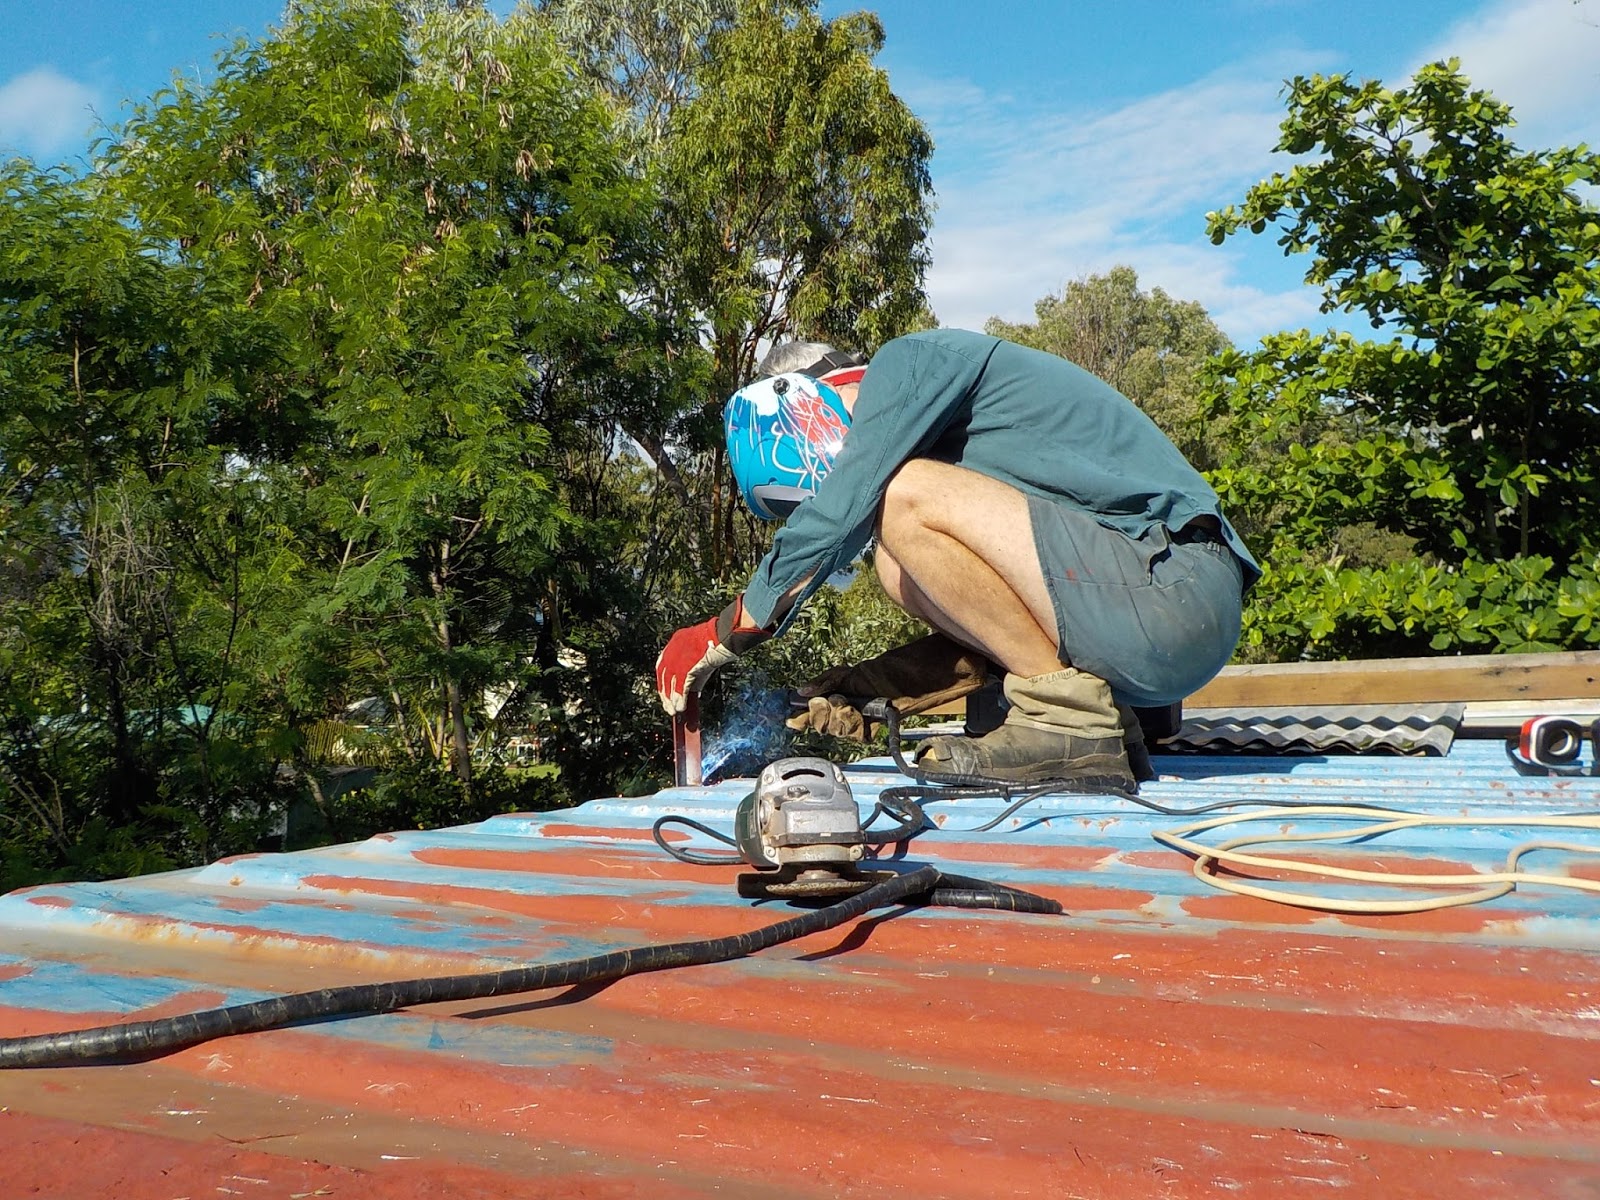
Welding on a support post for over roof. New weld helmet with auto-darken eye shield well worth it.

Most of the rust happens in water pools that form on the containers roof. These are often depressions caused from other containers hitting it during its service life.

So to avoid this - buy a good container that's not dented, has been sand blasted and painted. Then place the container so there's a slight cross slope to drain water off.

In retrospect if you buy an old dented container with minor rust like i did, then its worthwhile building the over roof as soon as its on site.

I hope my living and learning (the hard way)  helps other boat builders when setting up their yard.

A few other things

"Ned Kelly" the wood heater stove. Metalfix can withstand 1000 C.
The old trampoline frame restored

Wheel barrow tray - fibreglass and metalfix, holes sealed.
Also metalfixed parts underneath my trayback ute. Like the muffler, tail pipe, anything with corrosion.

A good feature is metalfix won't react badly with galvanized surfaces (unlike conventional rust converter such as phosphoric acid which damages the galvanizing)